Documentation
Takei - News and Magazine Joomla Theme
Thank you so much for purchasing our item.
If you have any questions that are beyond the scope of this help file, Please feel free to email via Item Support Page.
Getting Start
Require: Joomla version 4.x
Takei is News and Magazine Joomla Theme . It is built for bloggers, journalists, freelancers, editors, authors, writers, developers. Takei is fully responsive, light-weight, superfast joomla theme and built with html, css, js.
If you are a programmer, do you write blog or teach programming to people. You can choose this theme. Takei comes with code highlighting features.
Theme Setup
Takei QuickStart Installation
By using this package, you will see your website exactly as our Demo with sample data. This is applied when you need a fresh Joomla with our template The following steps will guide to install a quickstart package of Takei Joomla Theme. Please take a look the video tutorial here
Install with Template and Extensions
Please refer the video here:
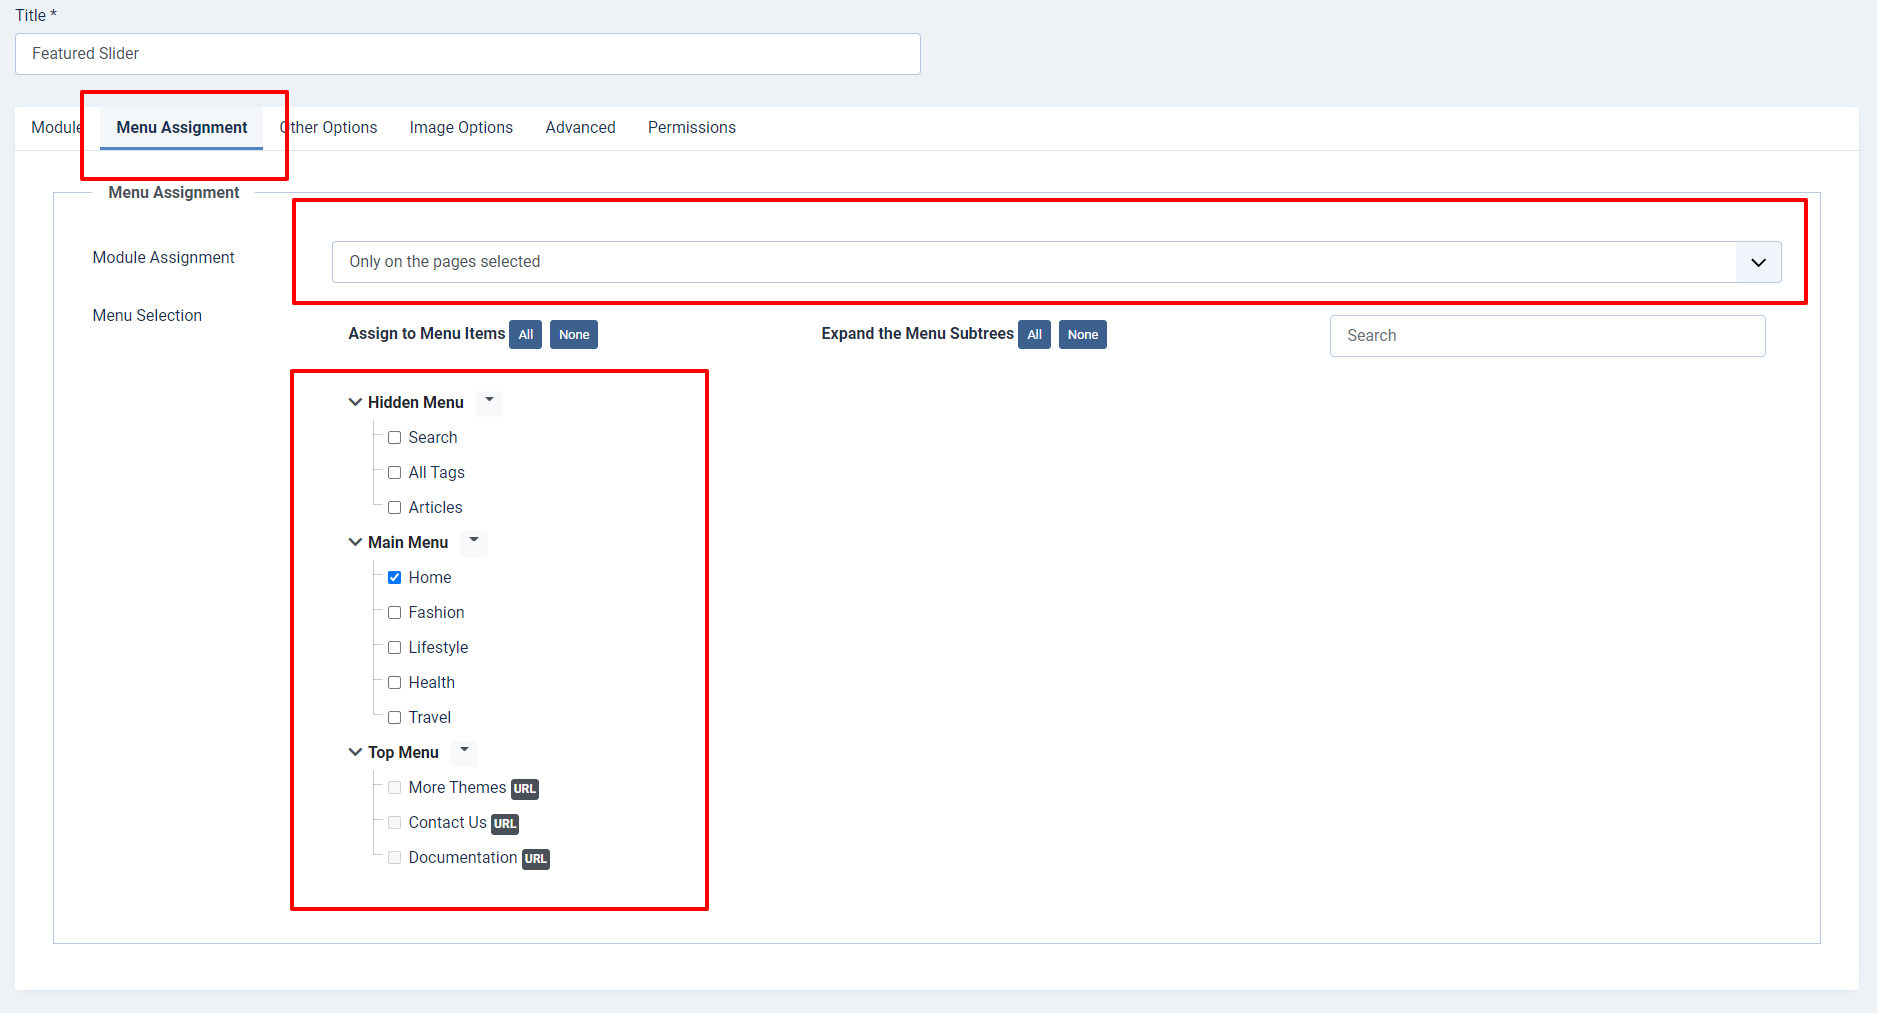
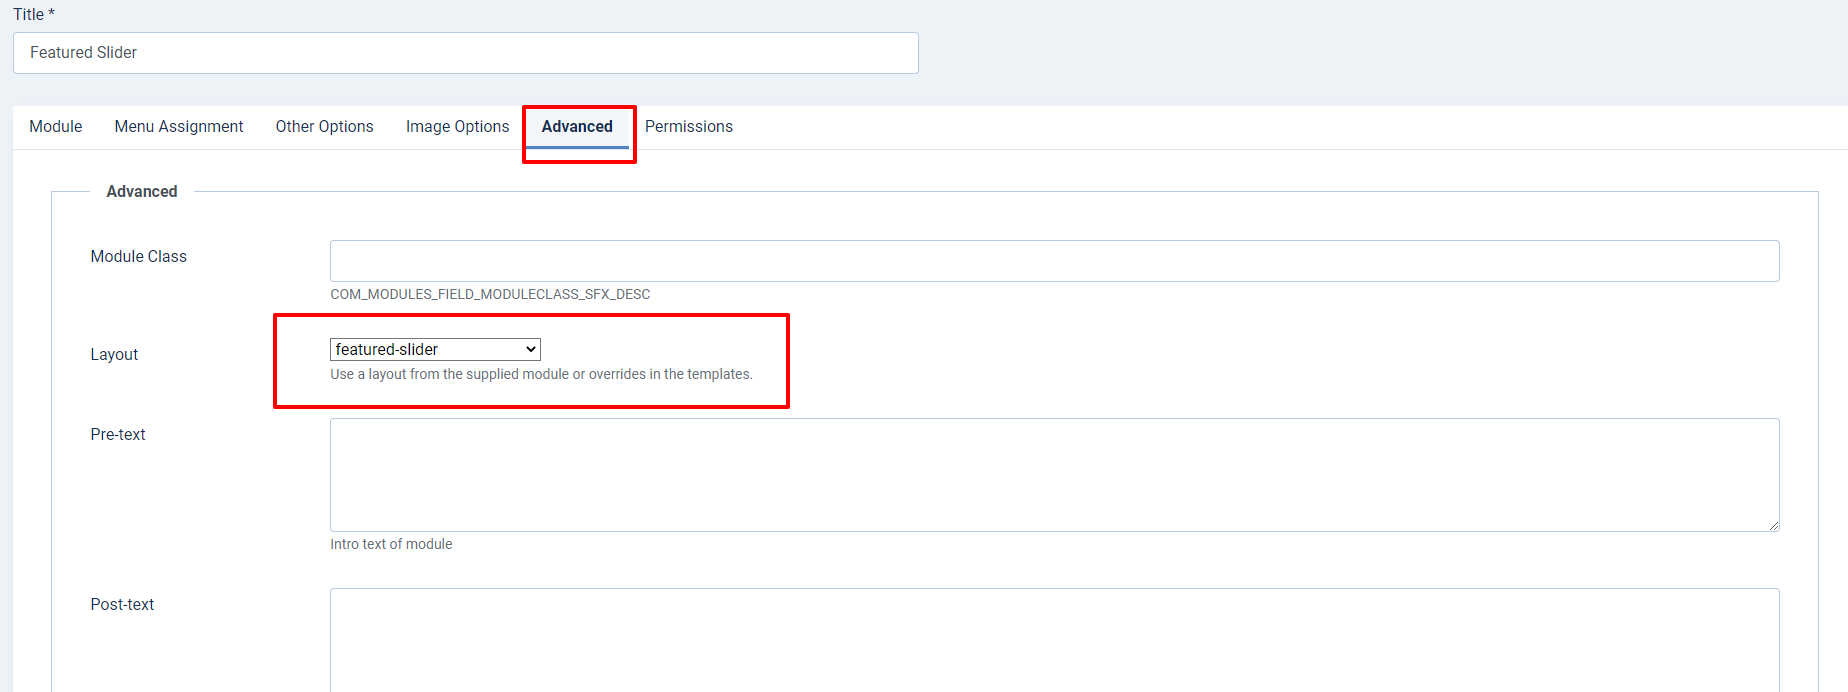
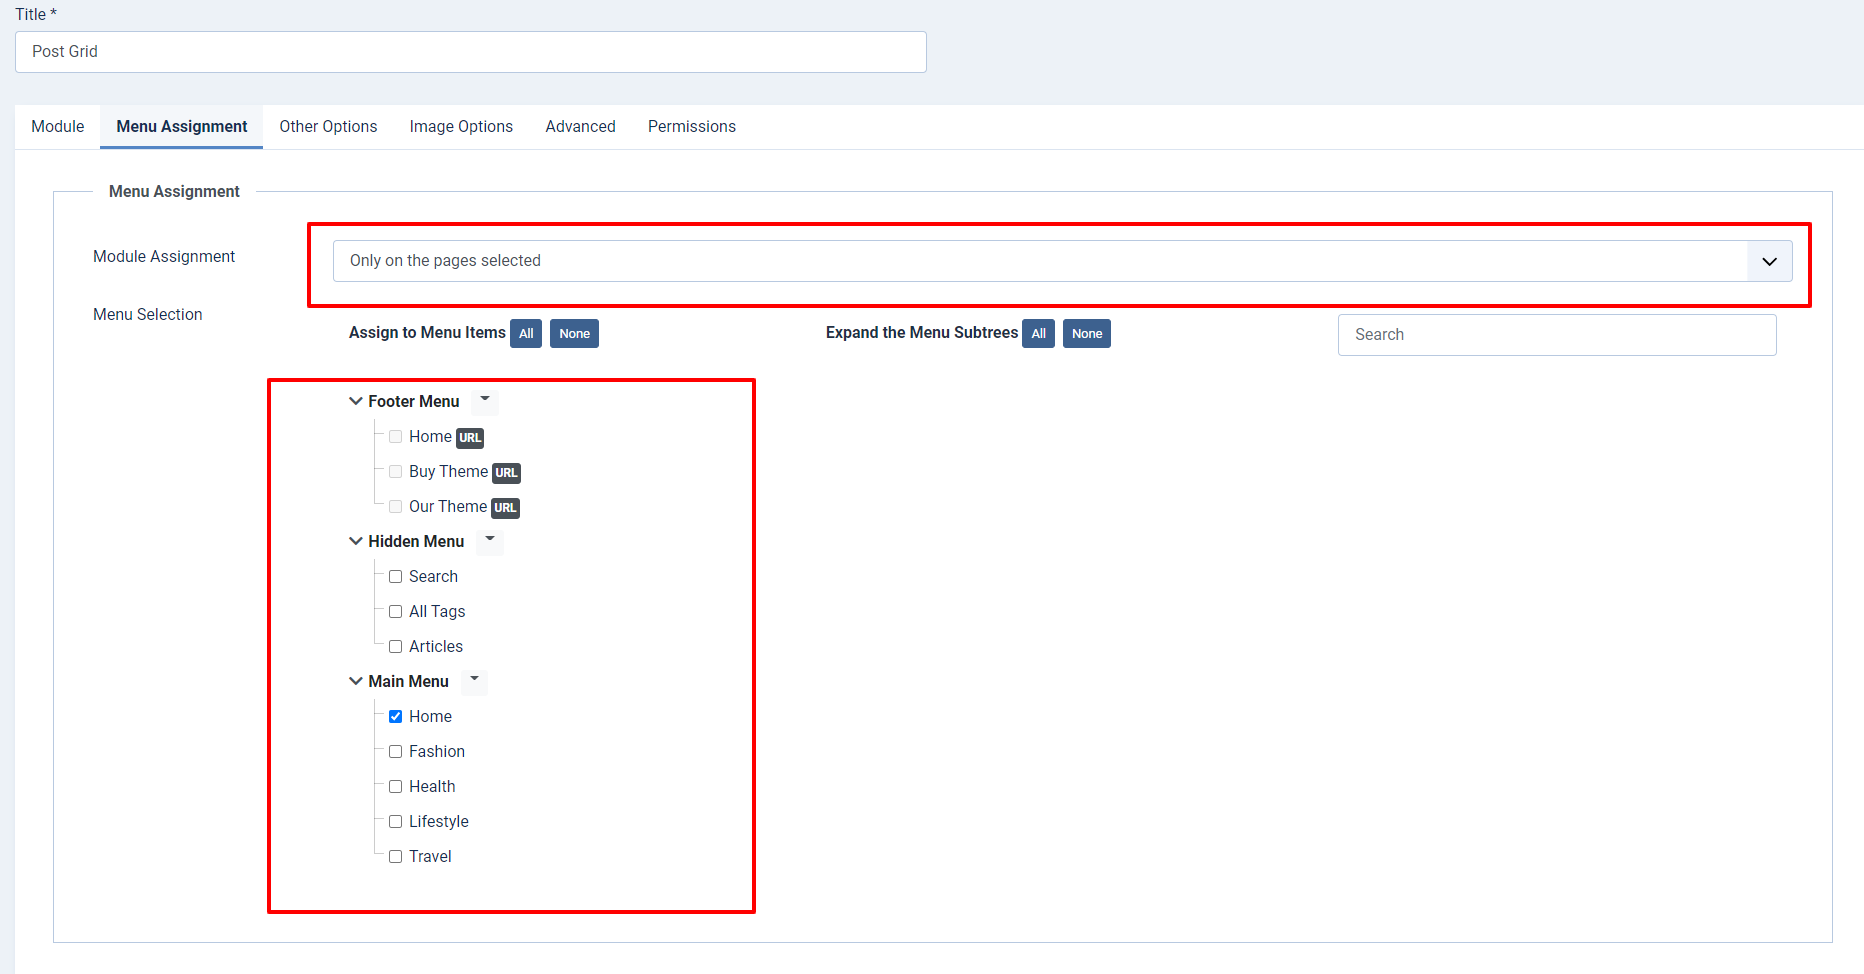
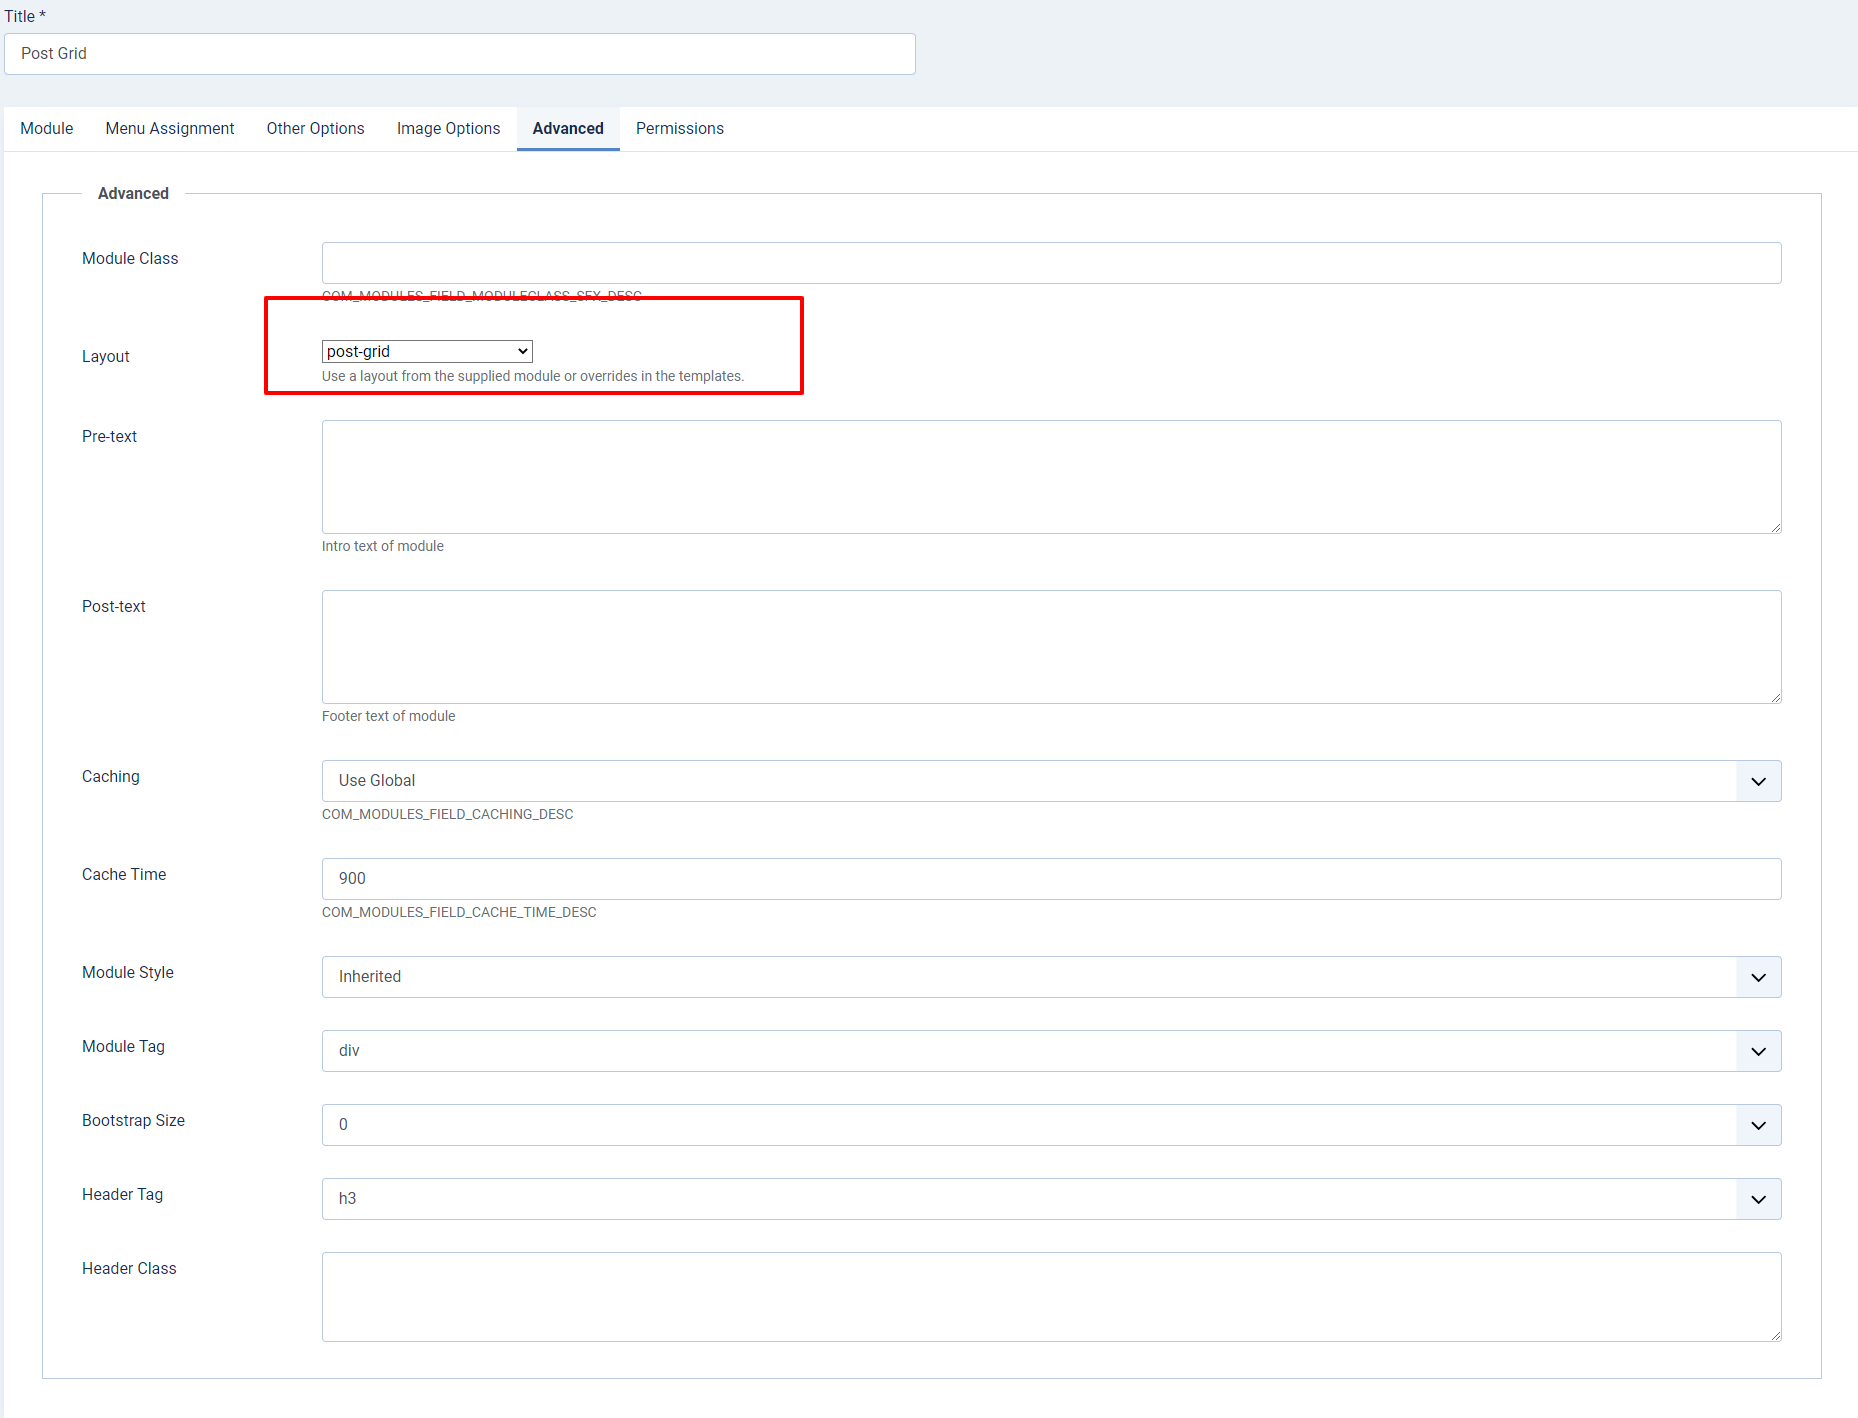
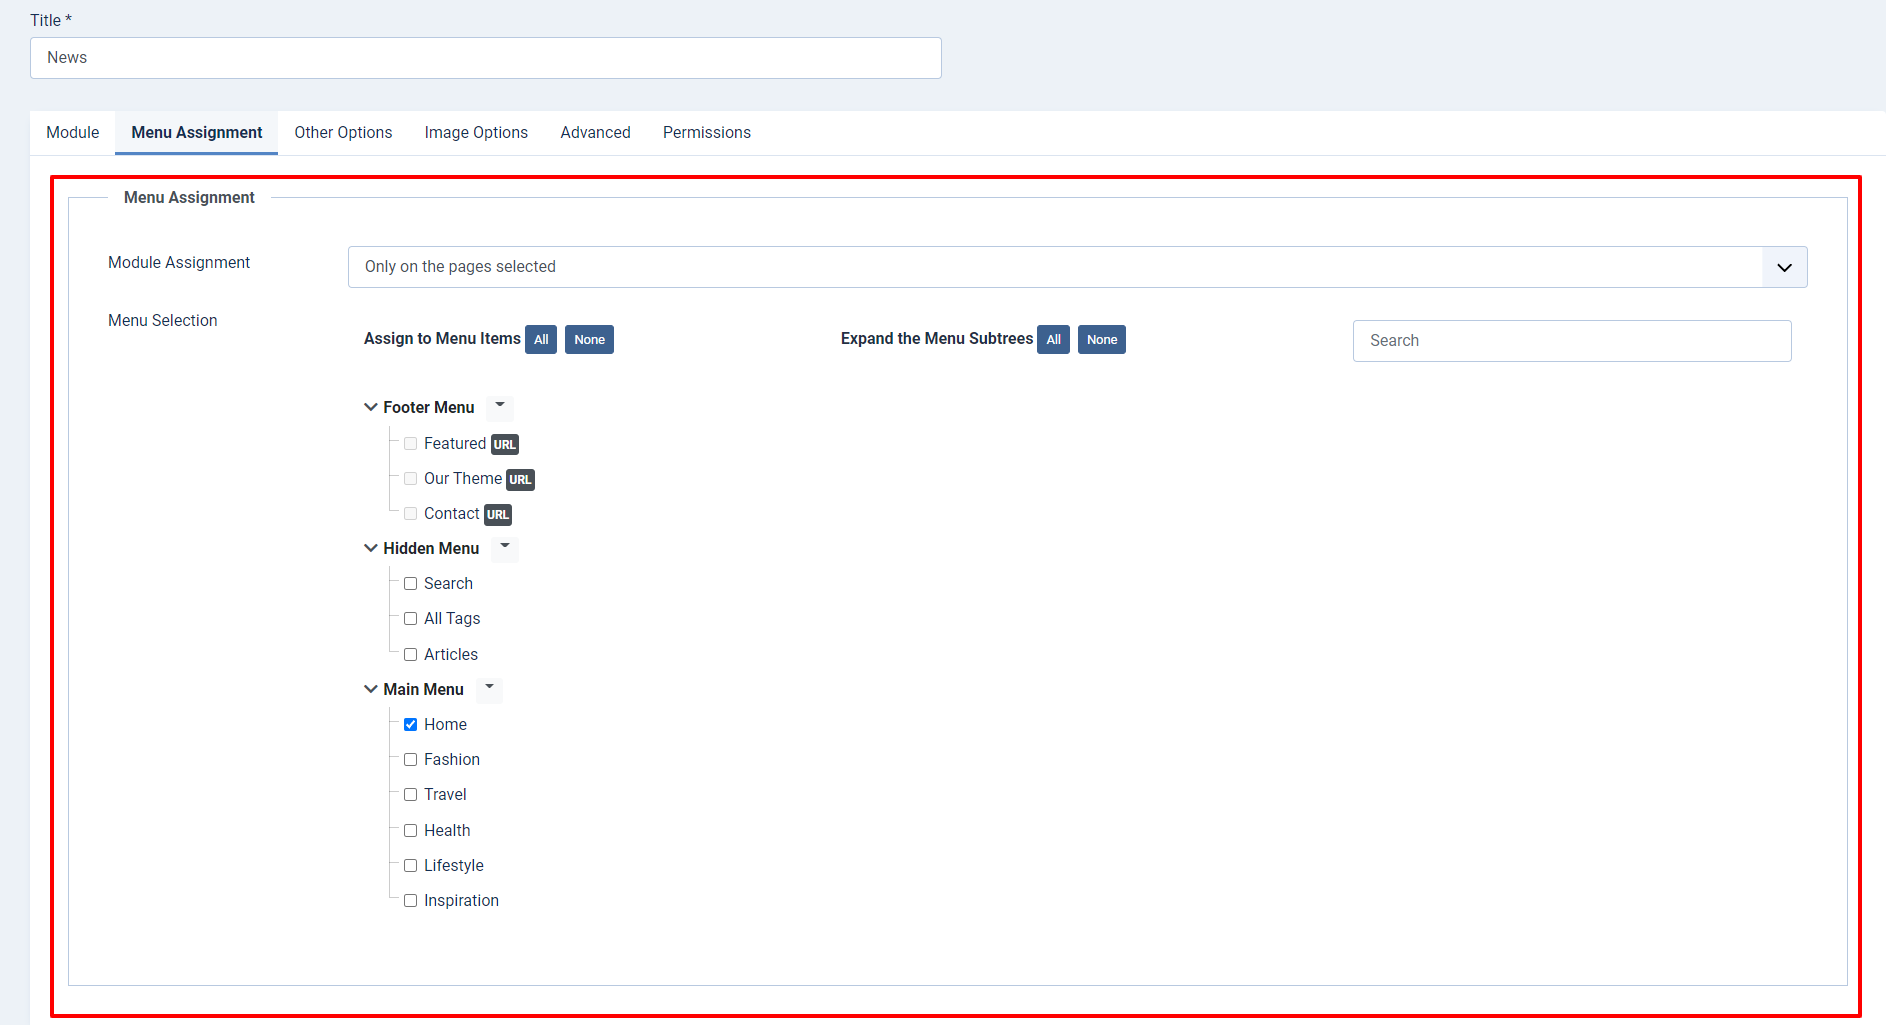
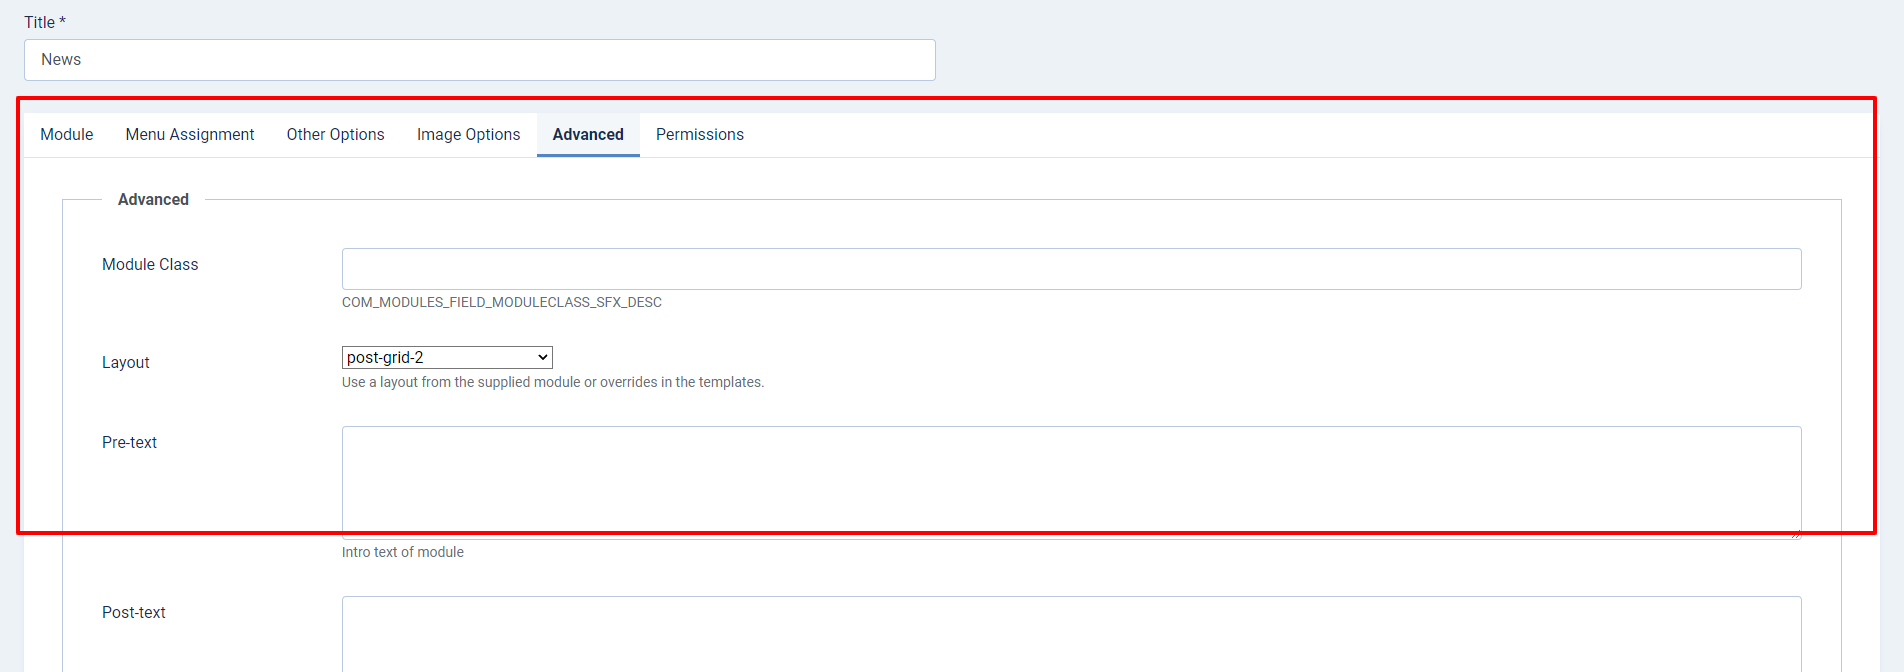
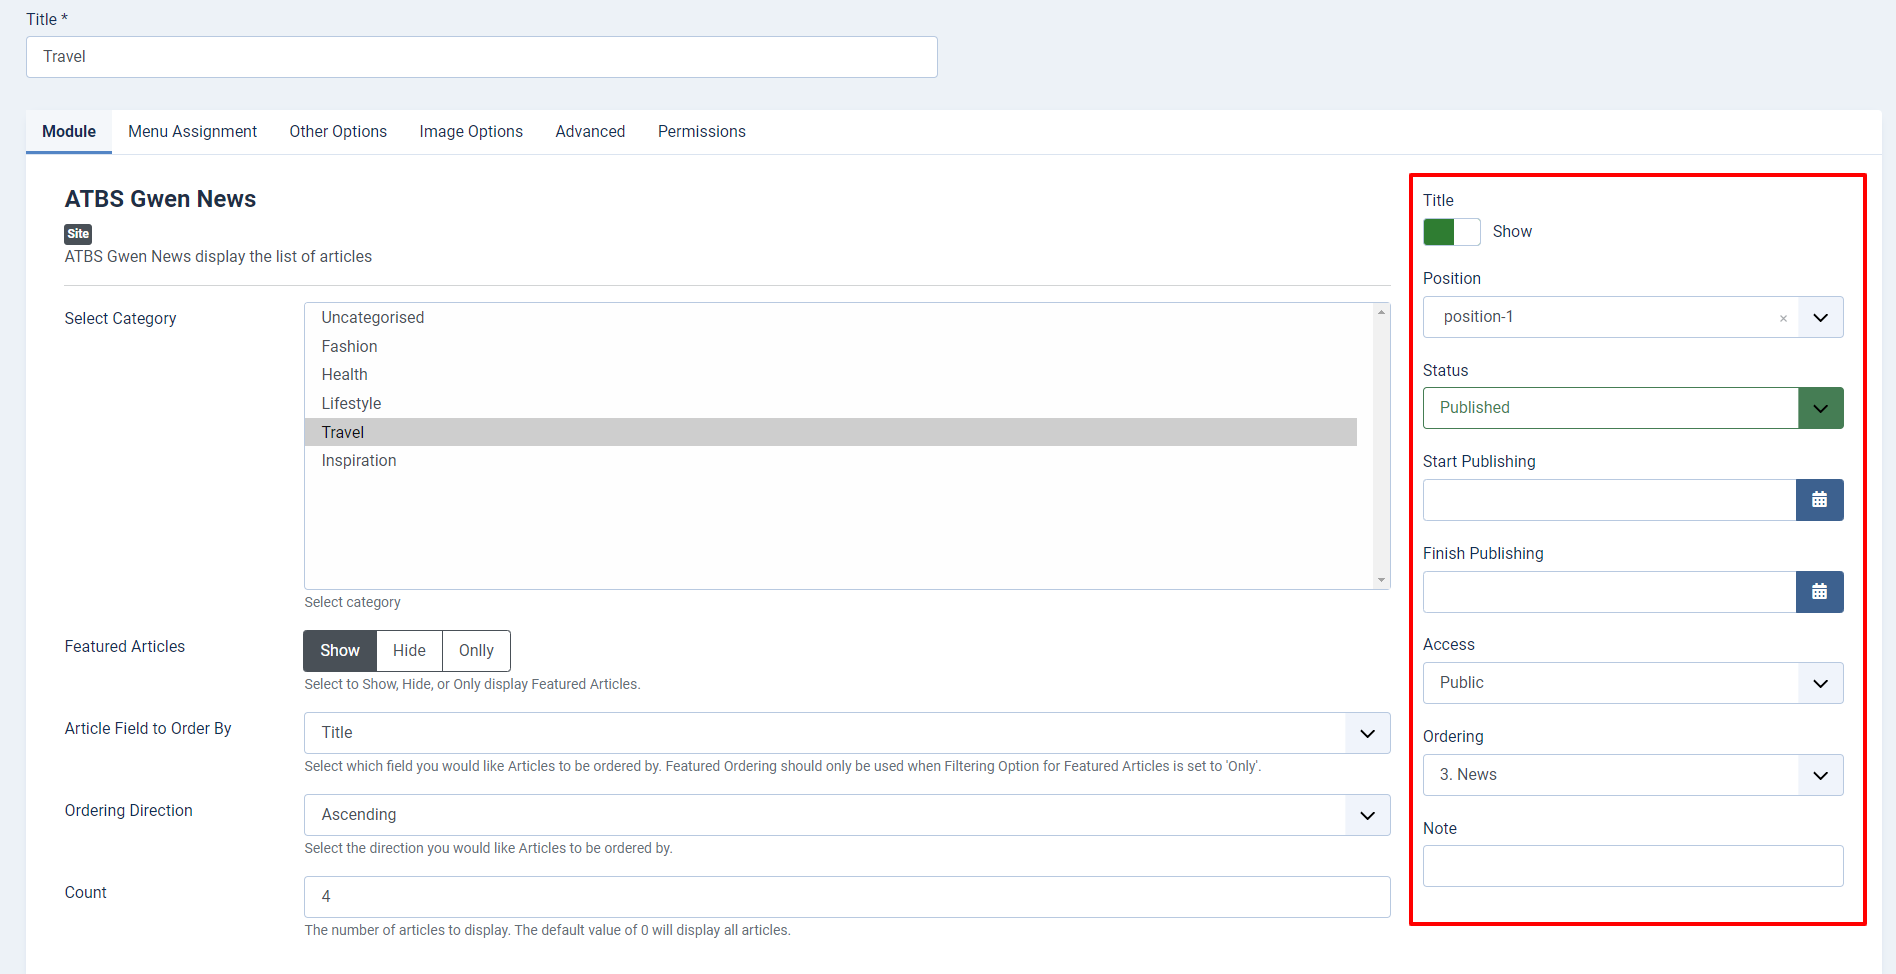
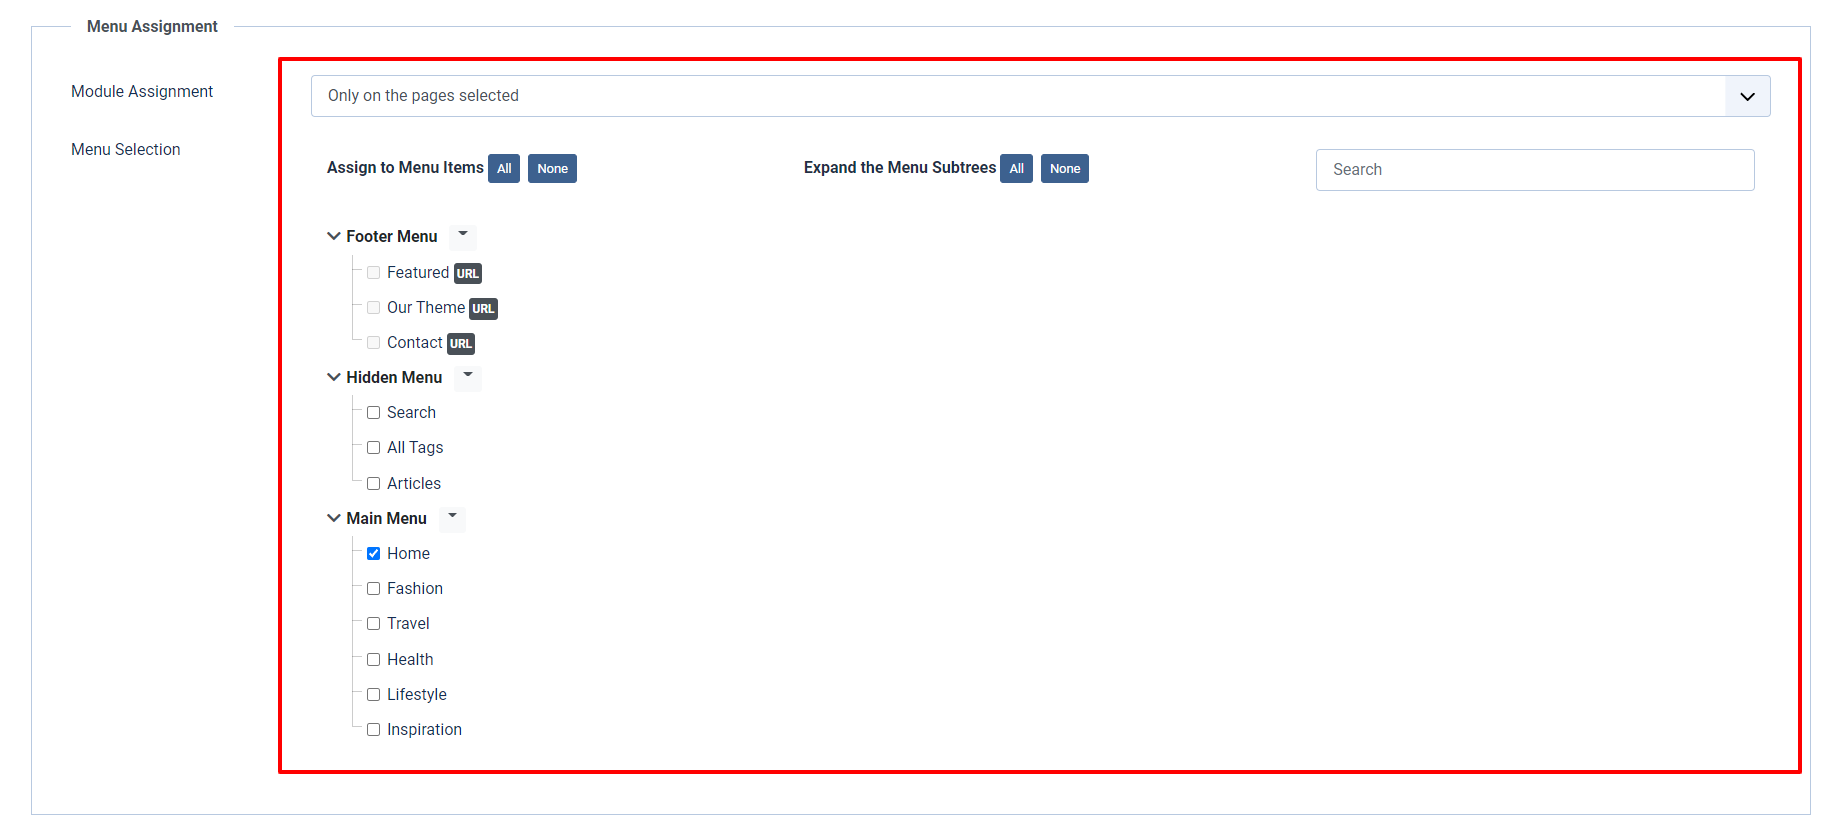
Layout Positions

Settings panel
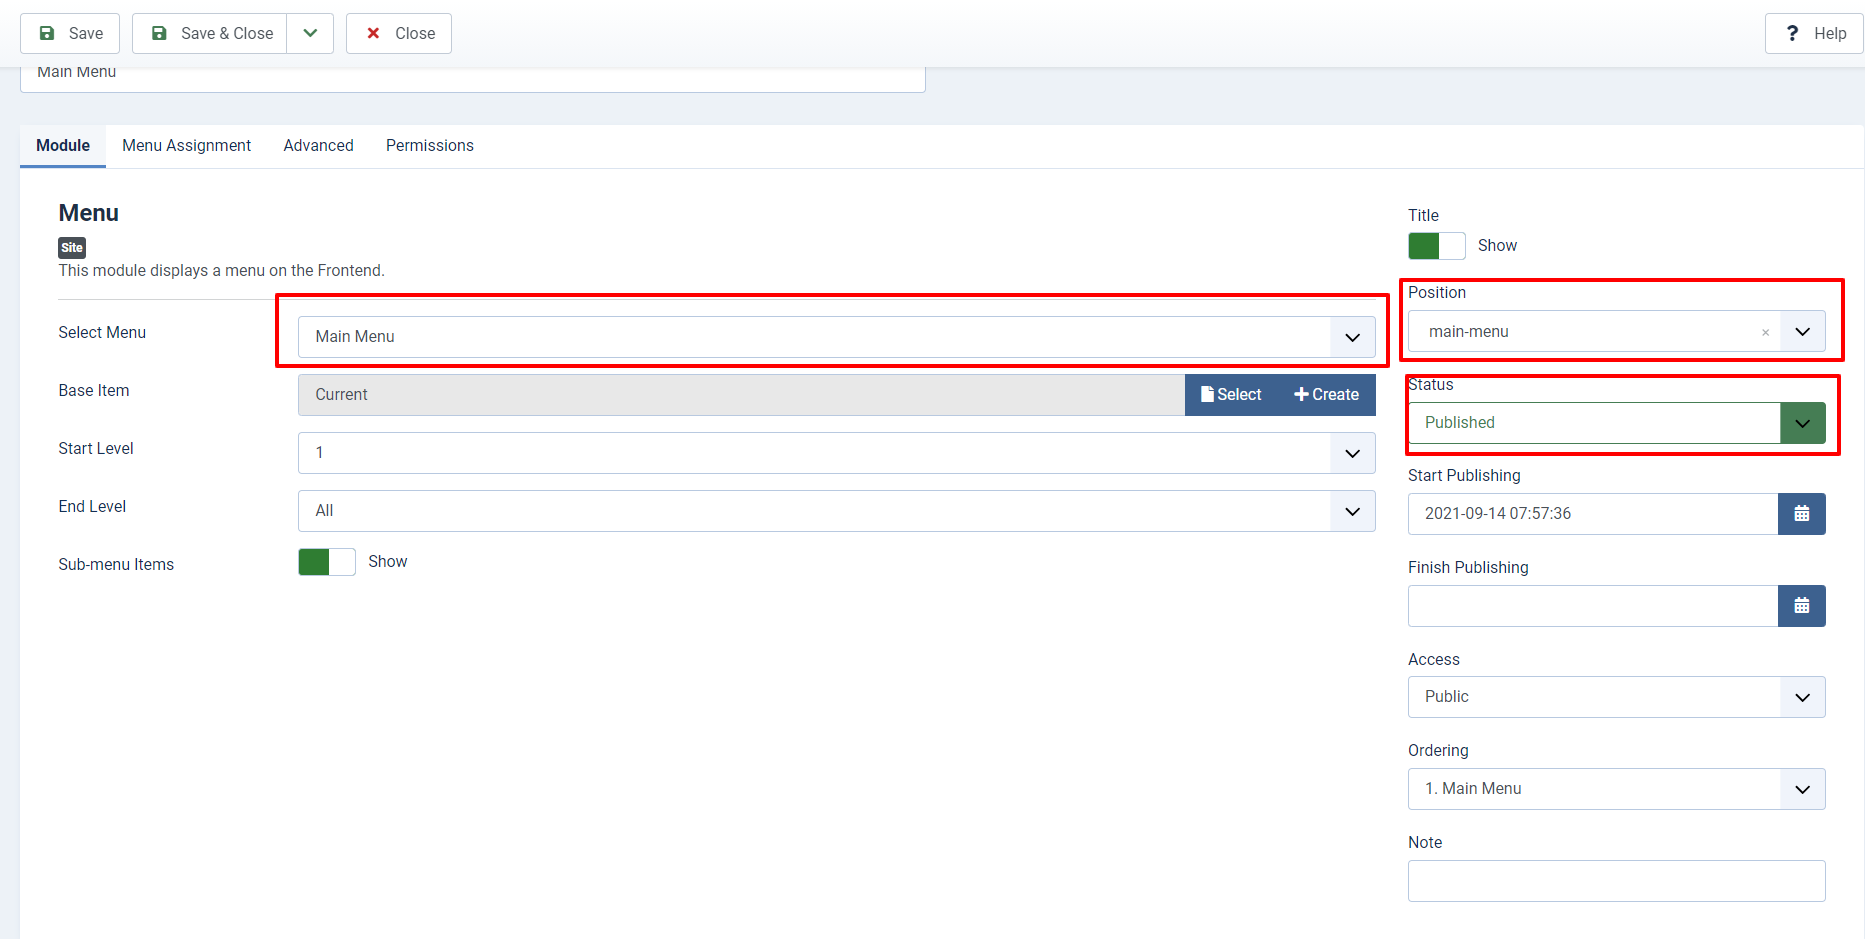
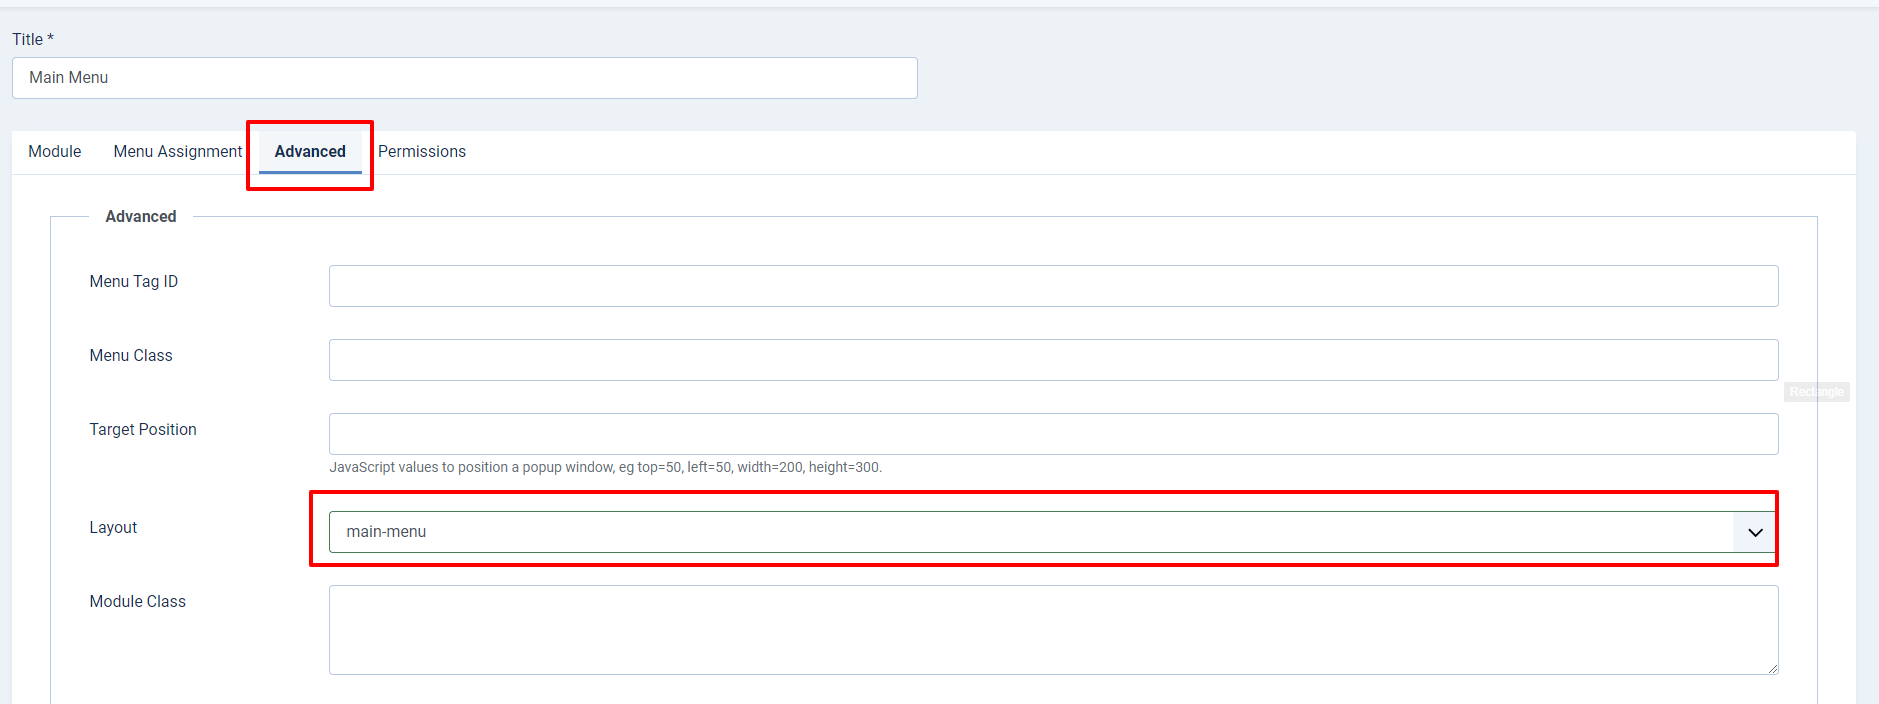
Position Main Menu

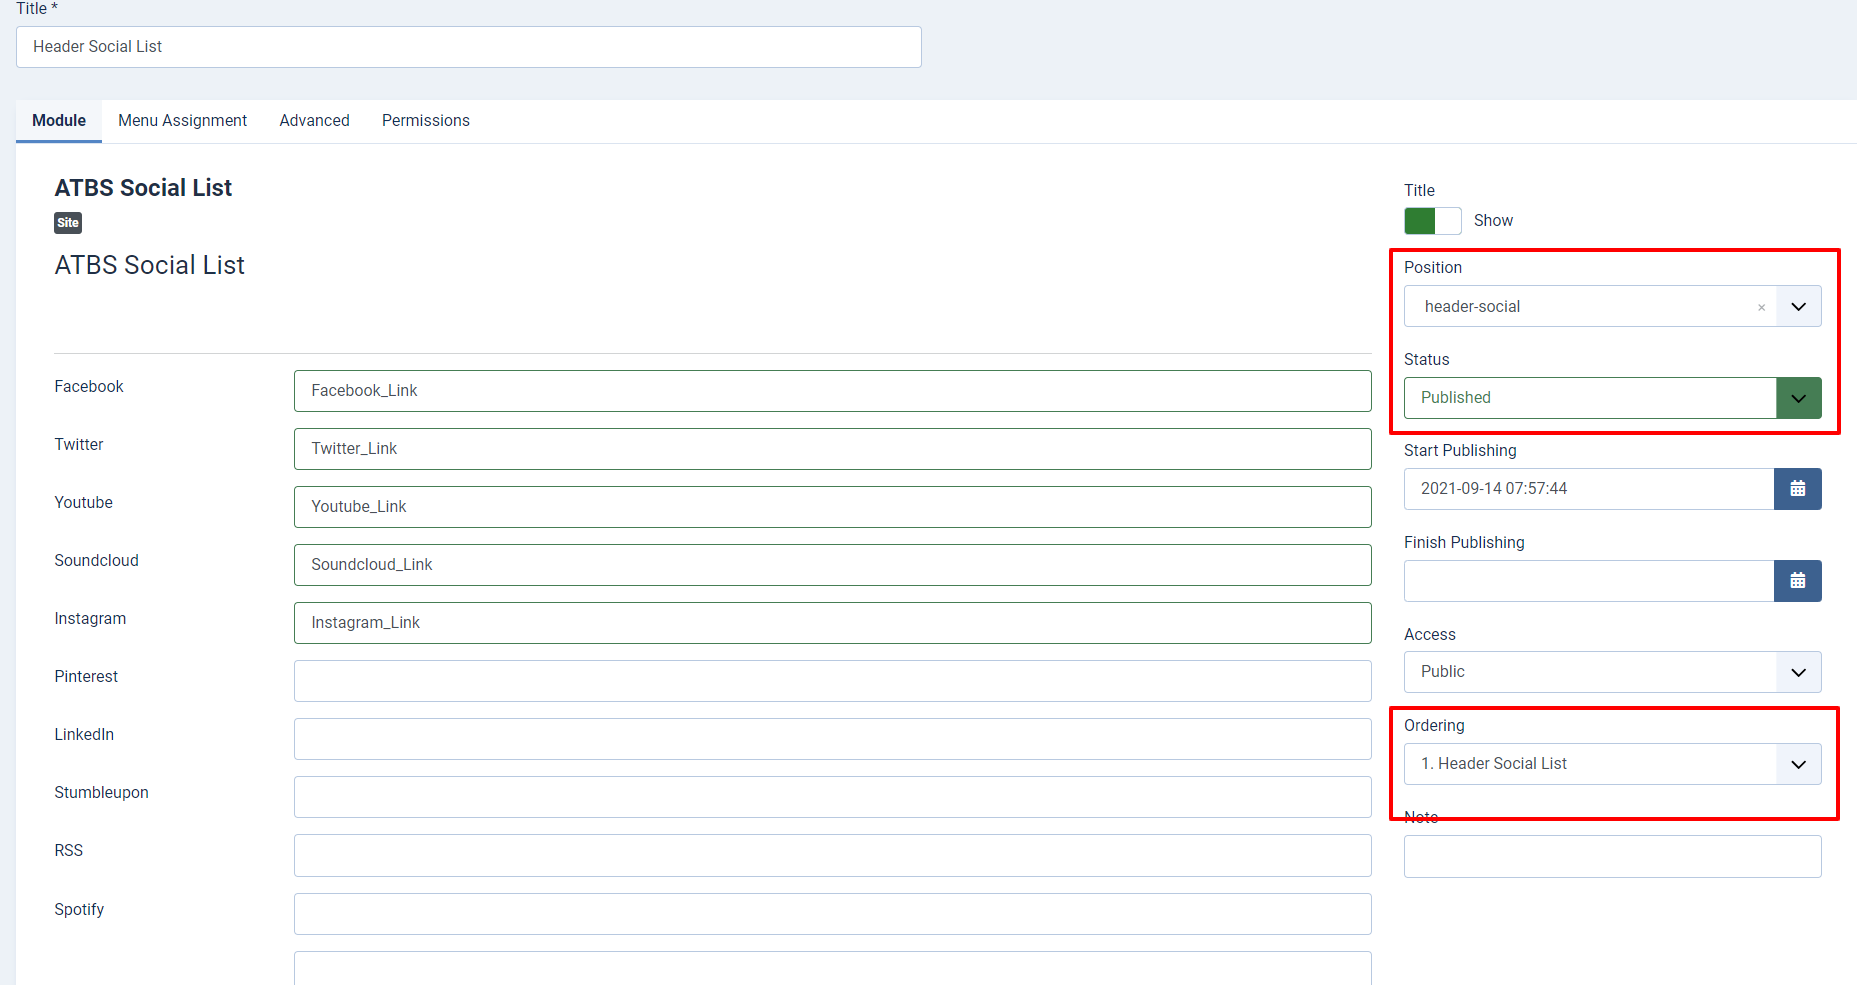
Position: Header Social

Position: Header Search


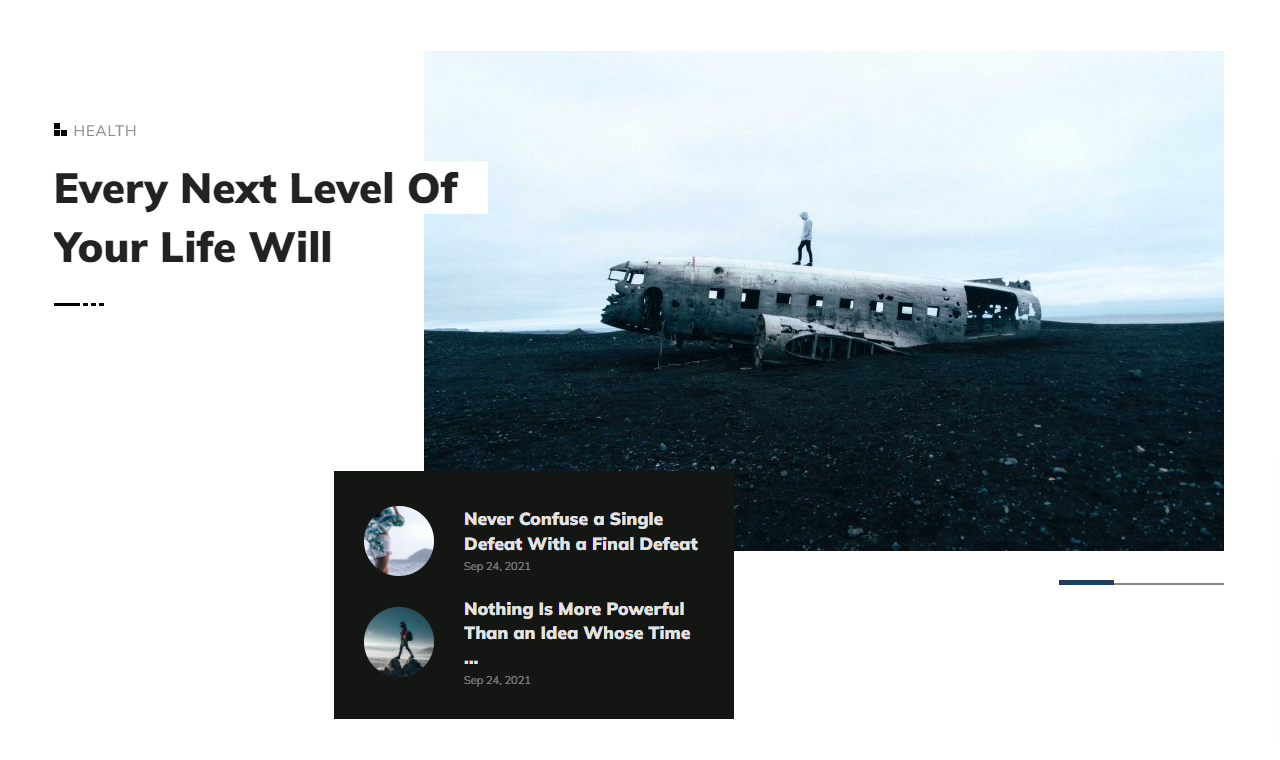
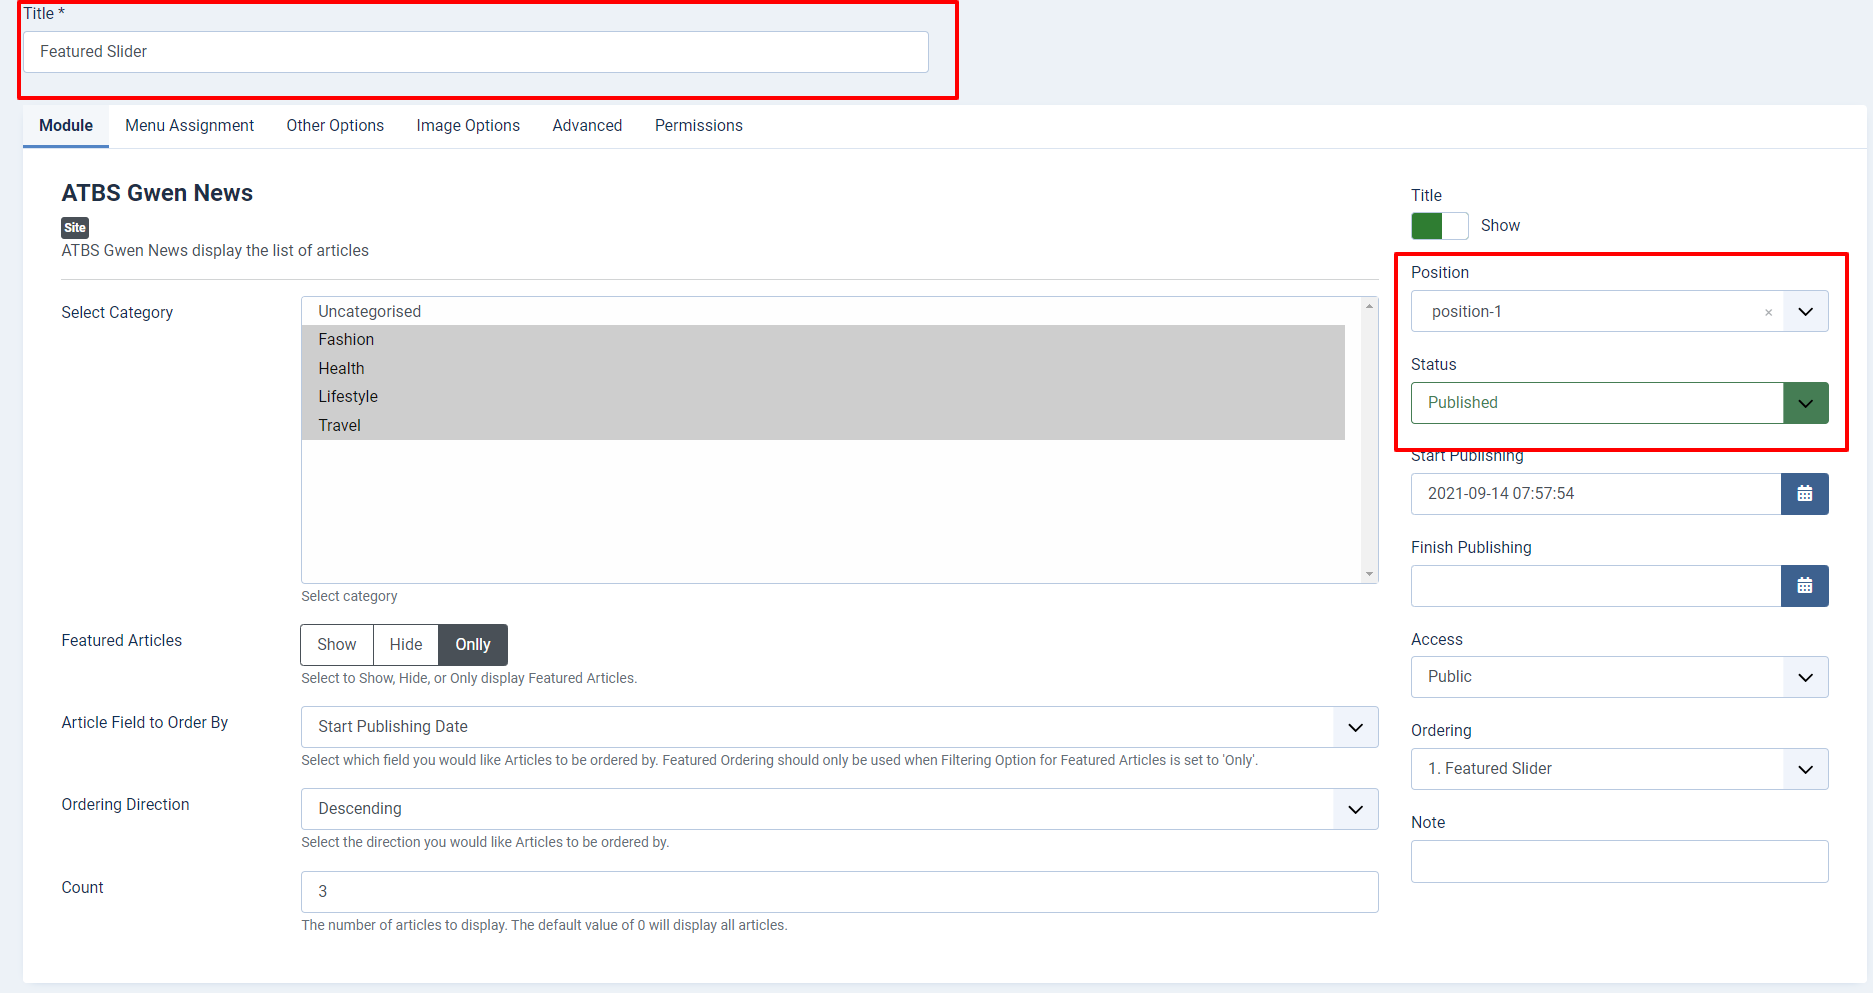
Position 1: Featured Slider
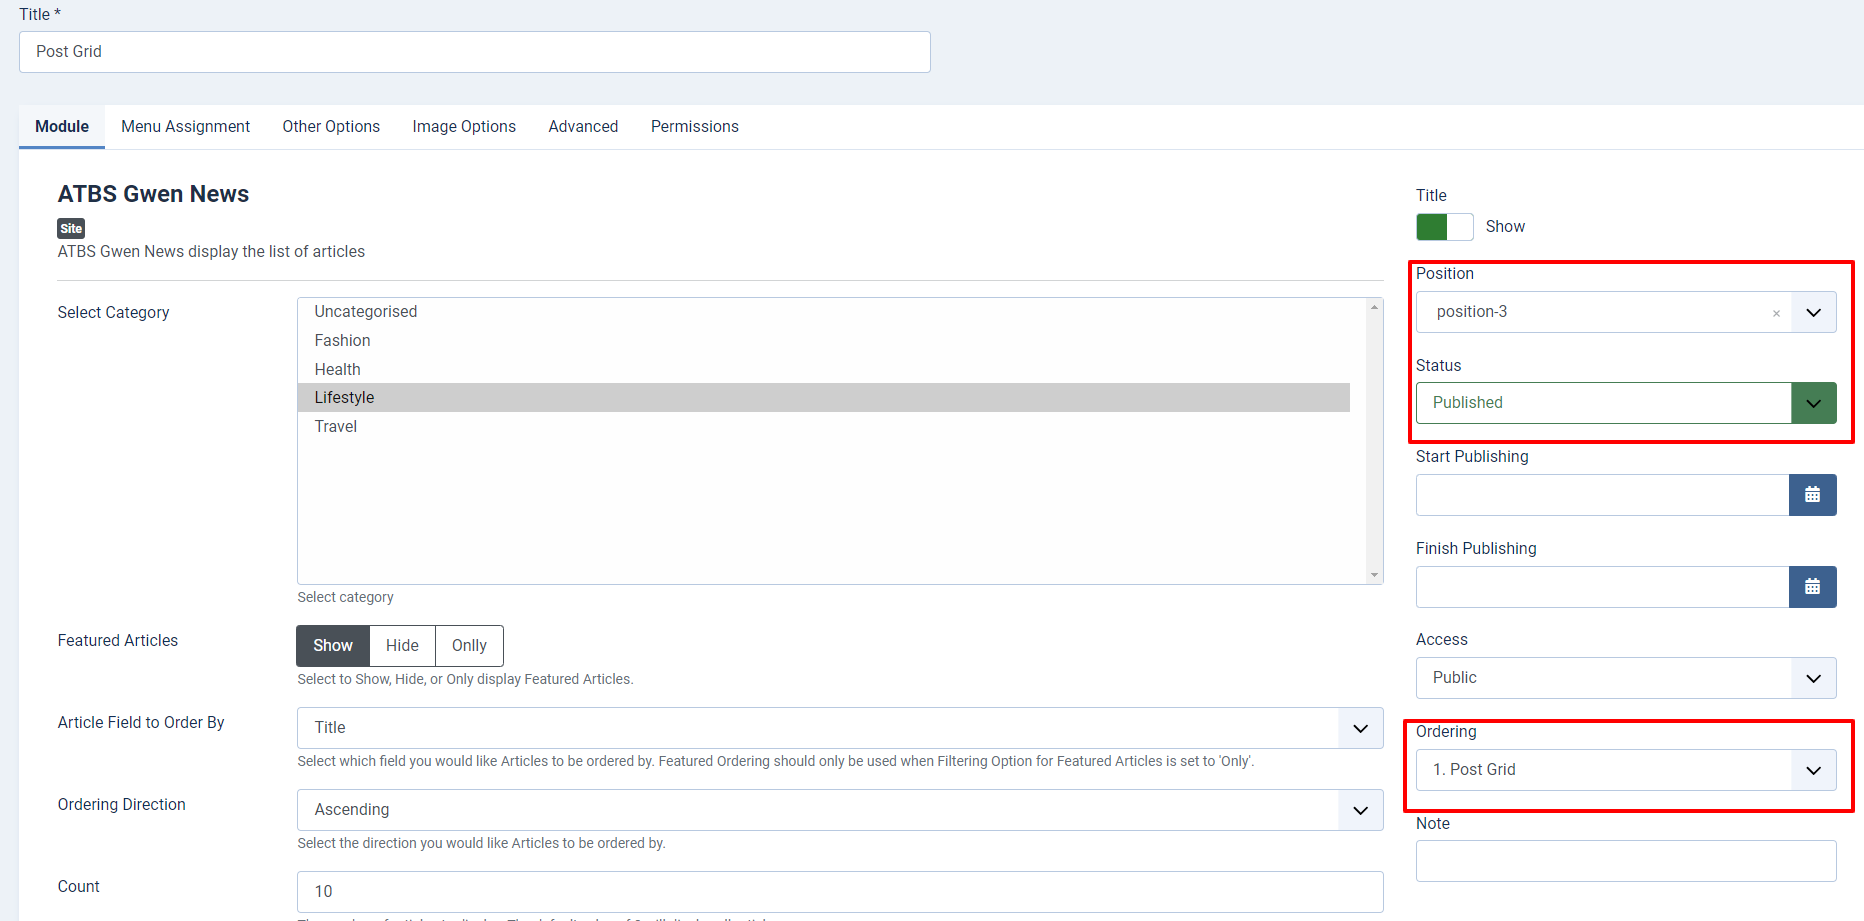
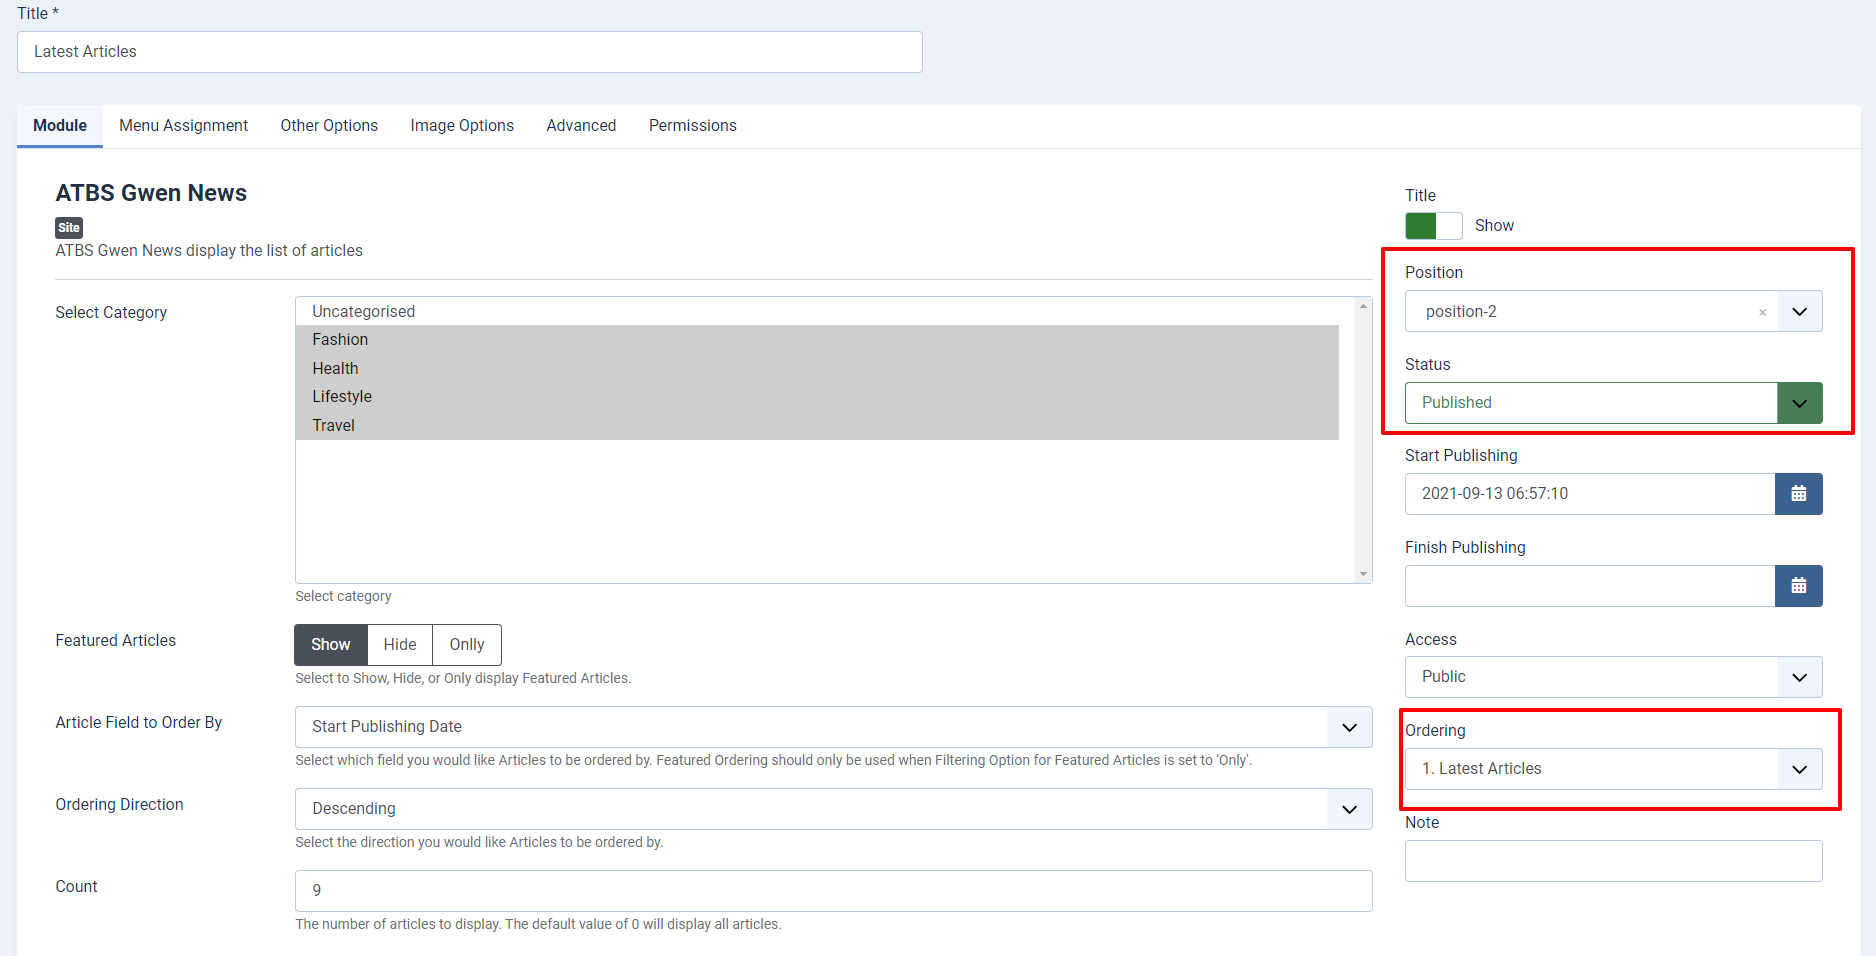
Position 2: Posts Grid
Position 3: Posts Grid 2
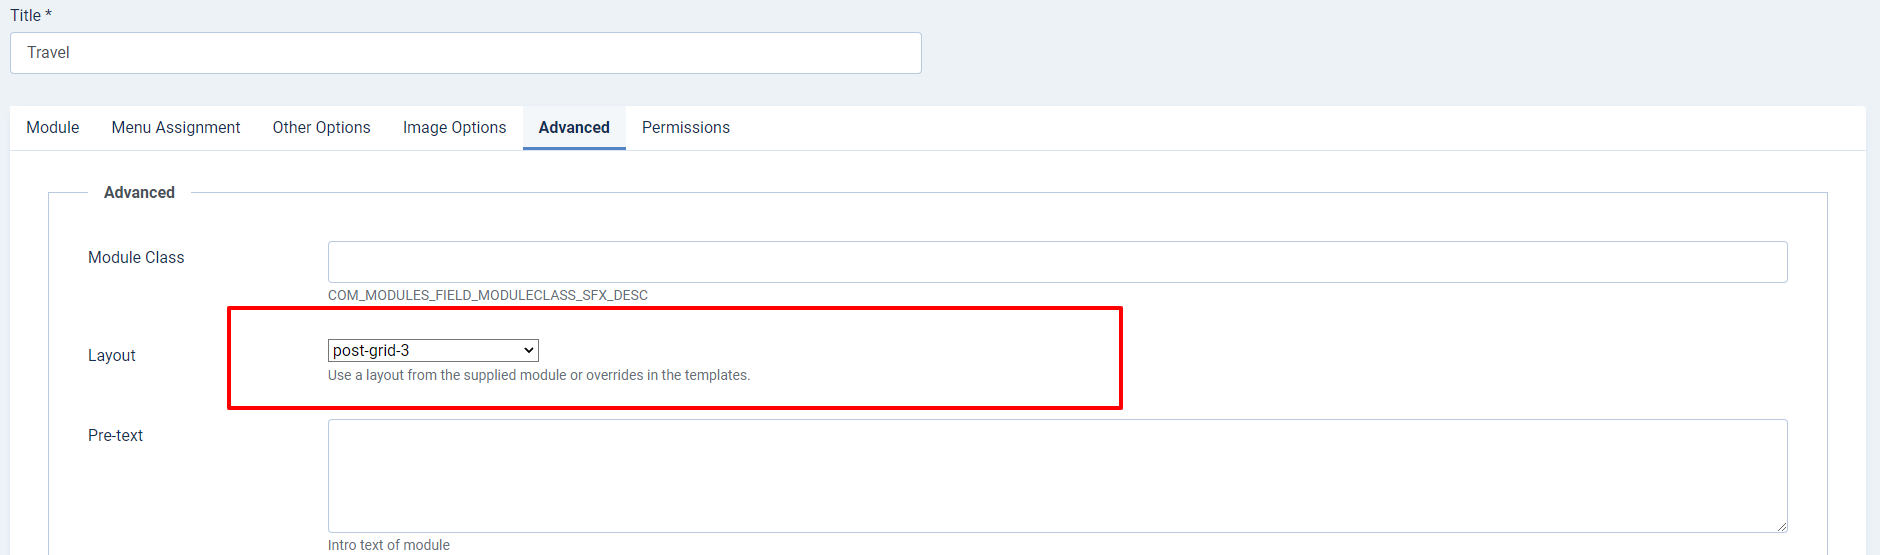
Position 4: Posts Grid 3
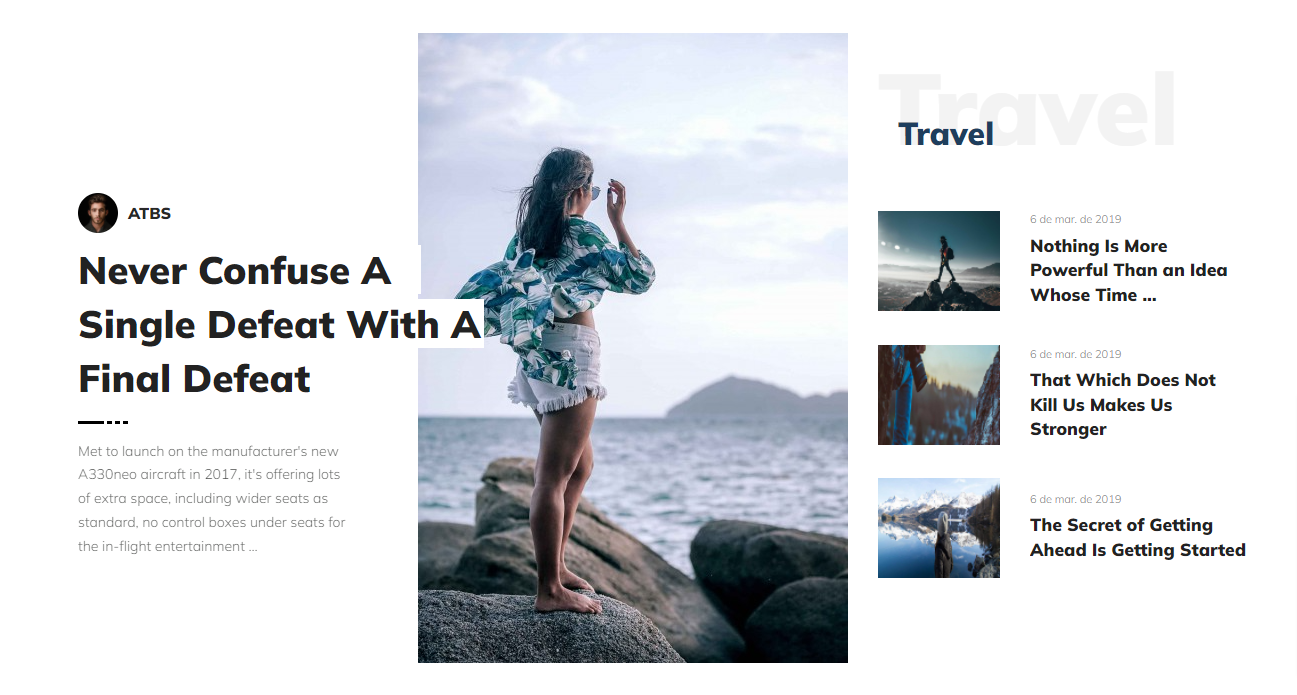
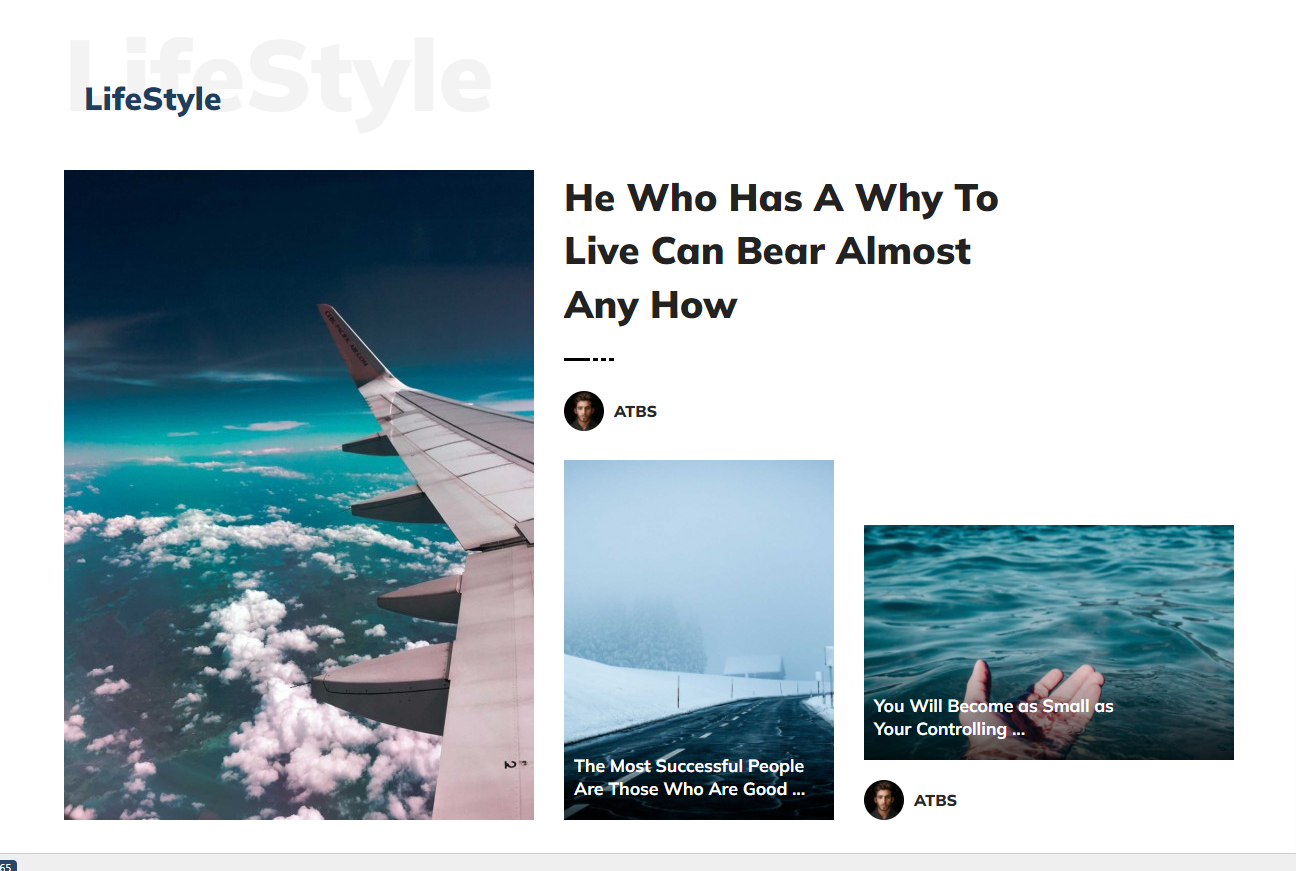
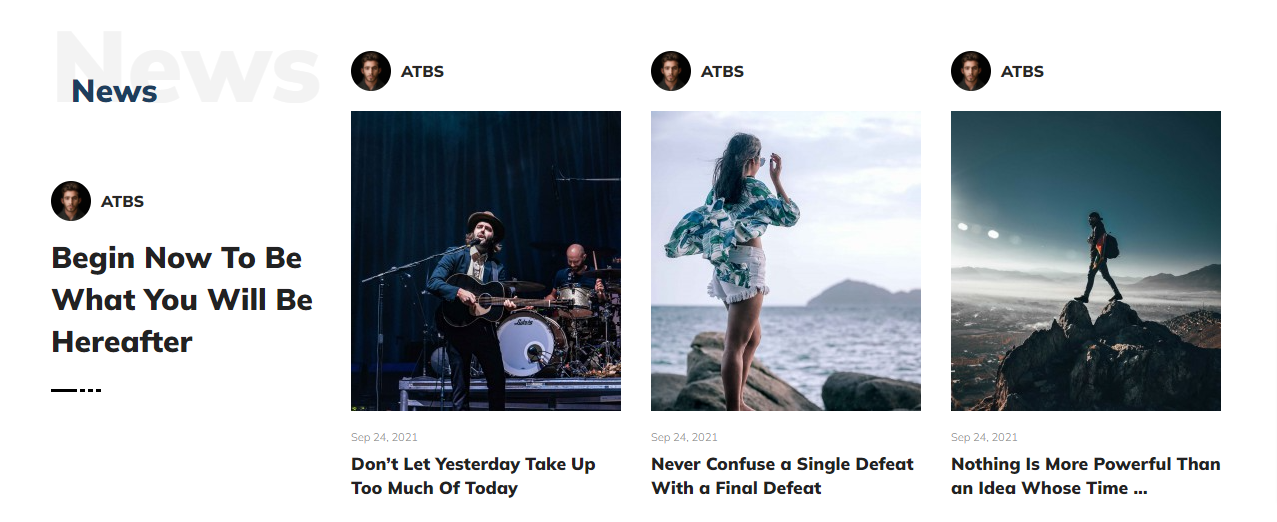
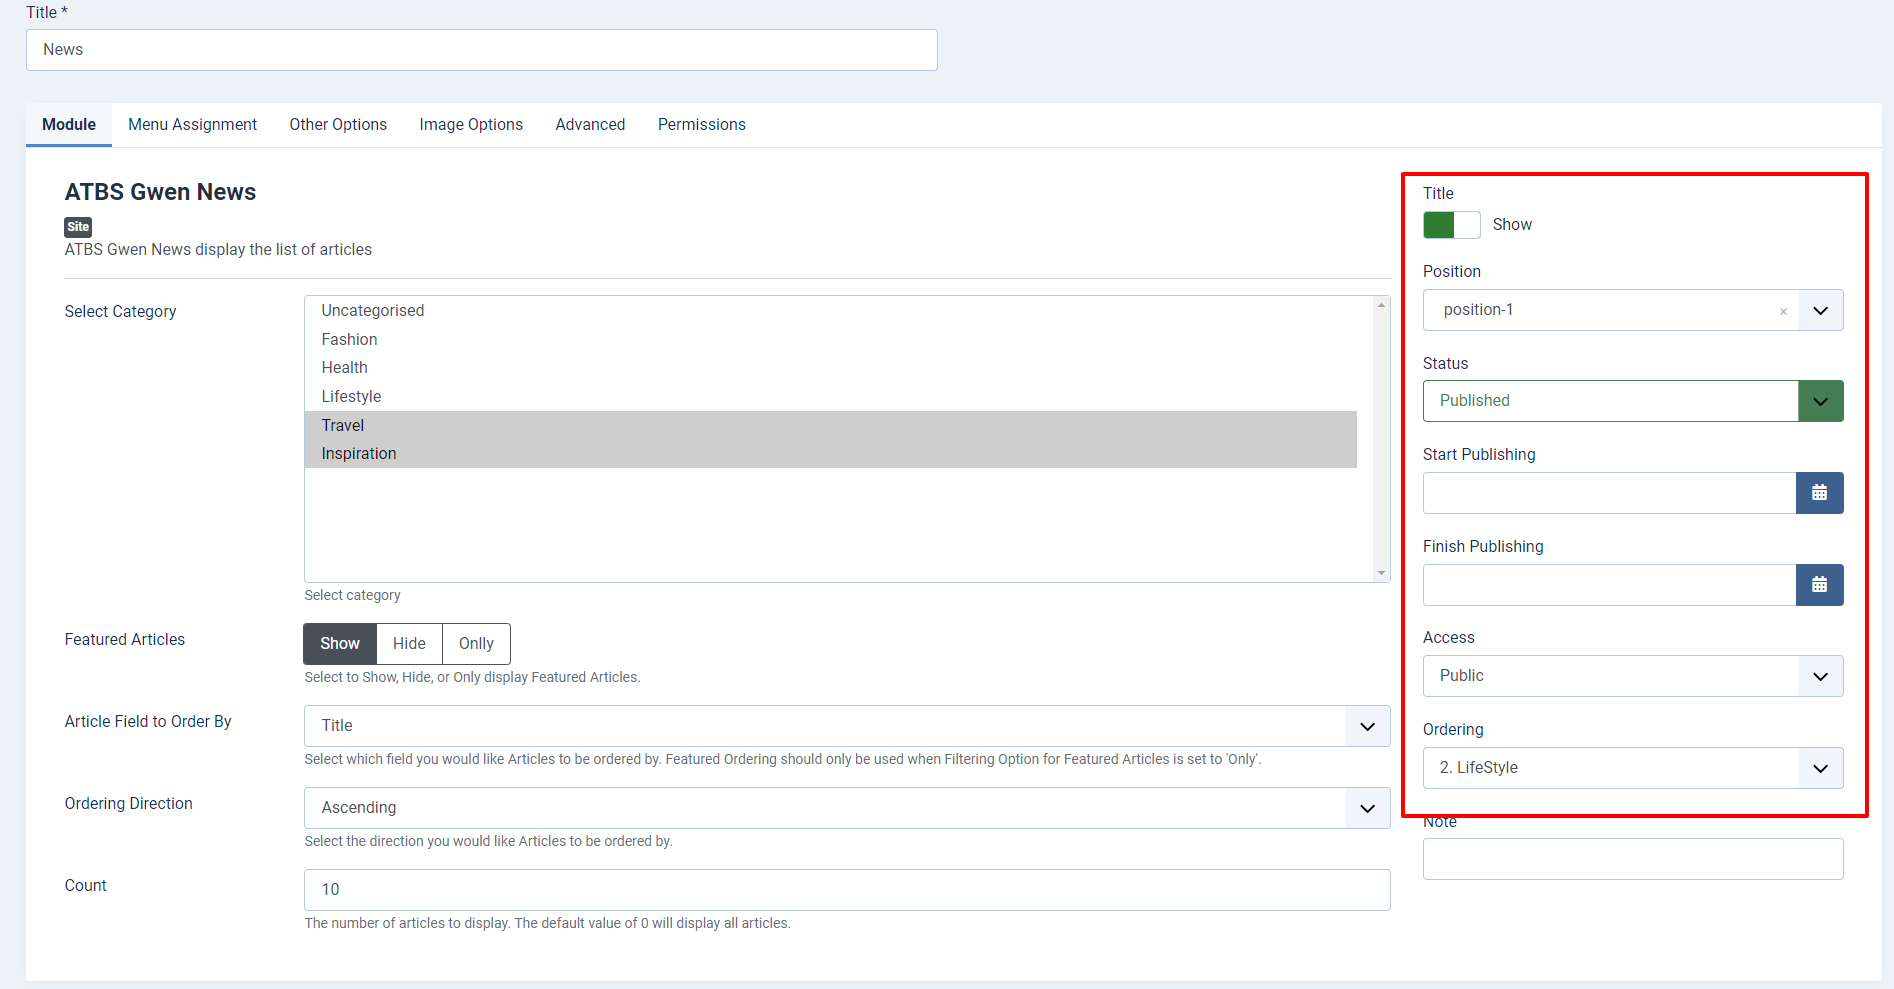
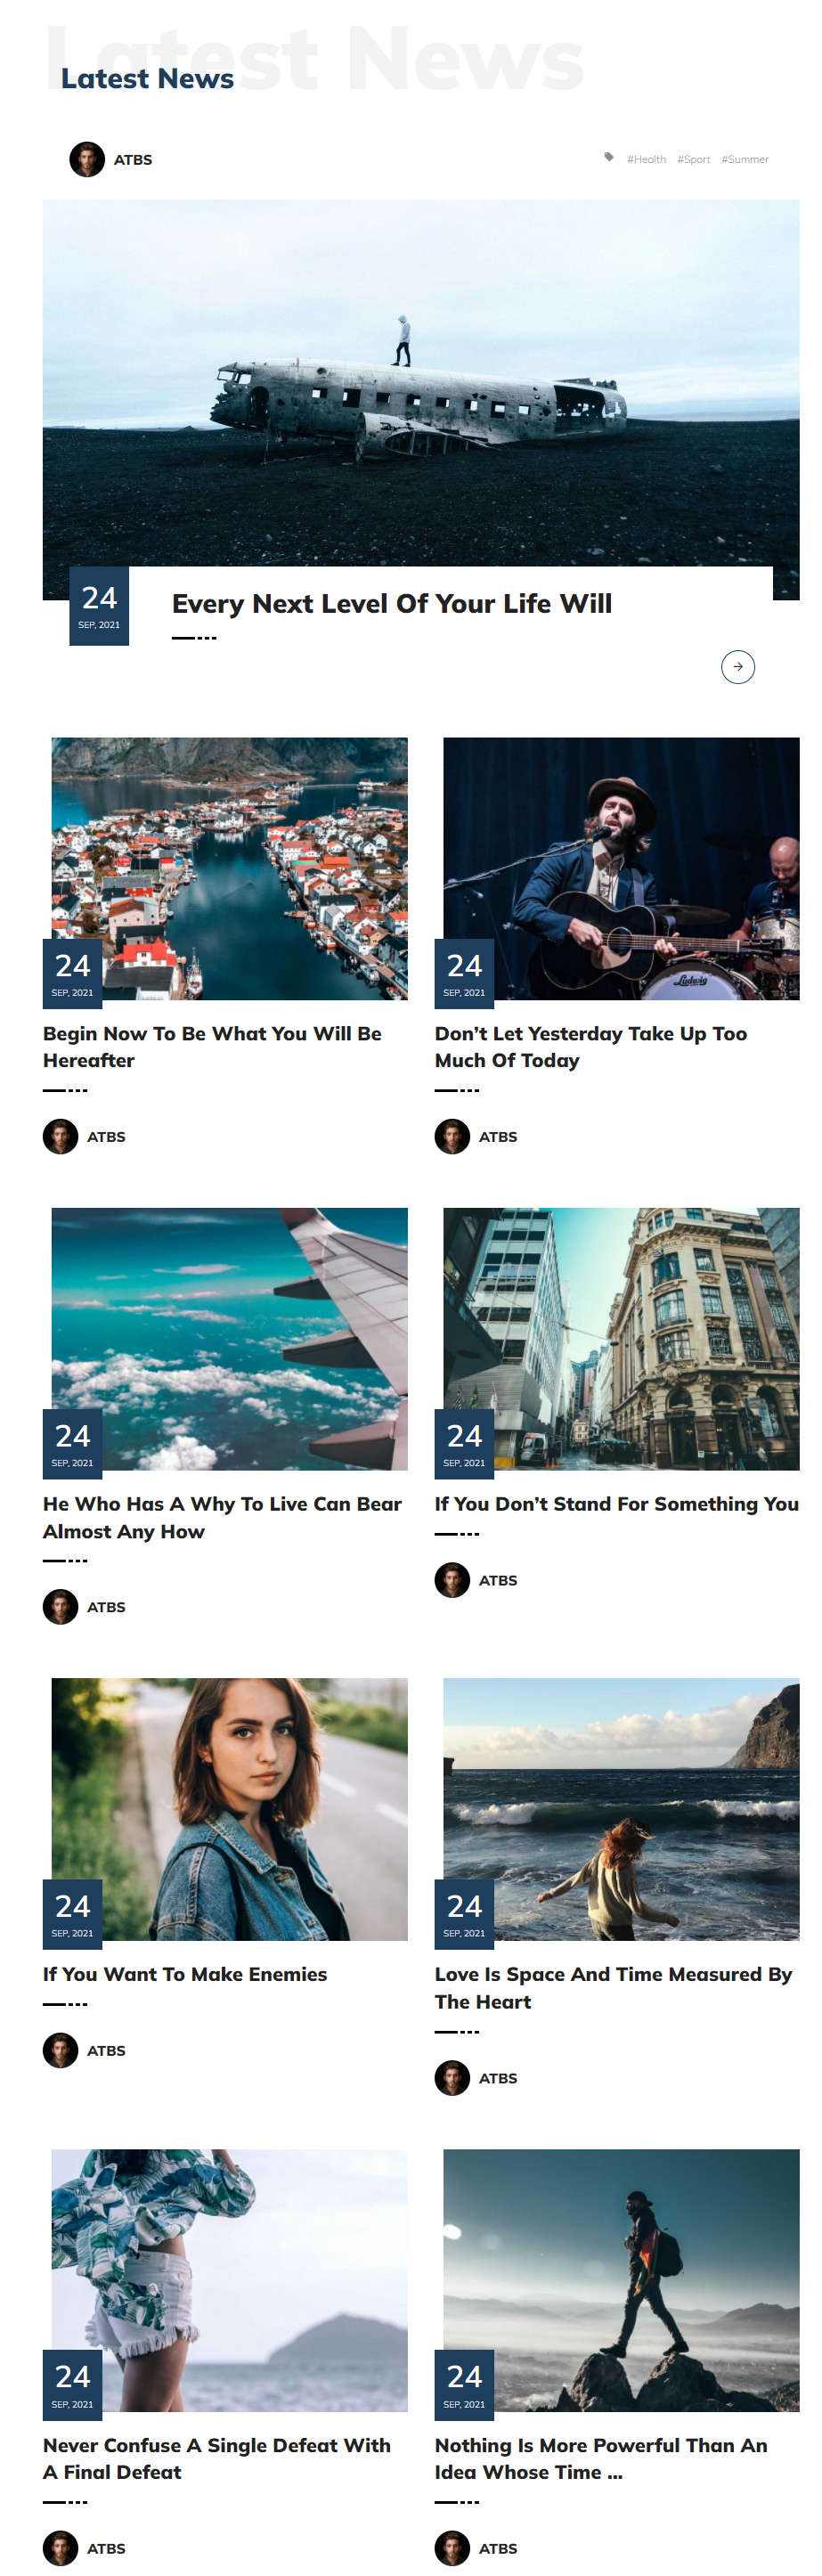
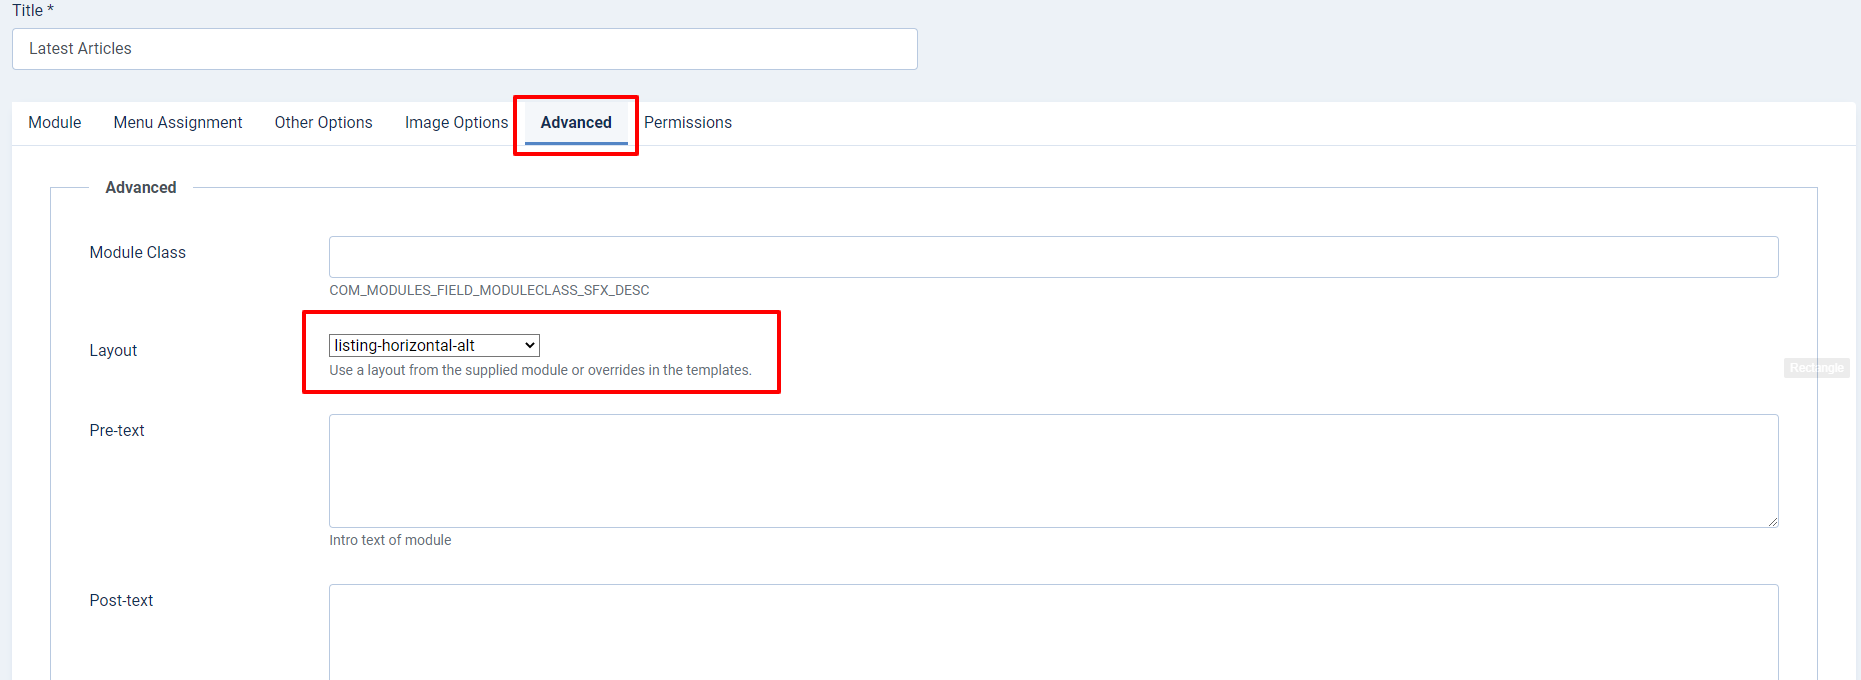
Position 3: Latest News List

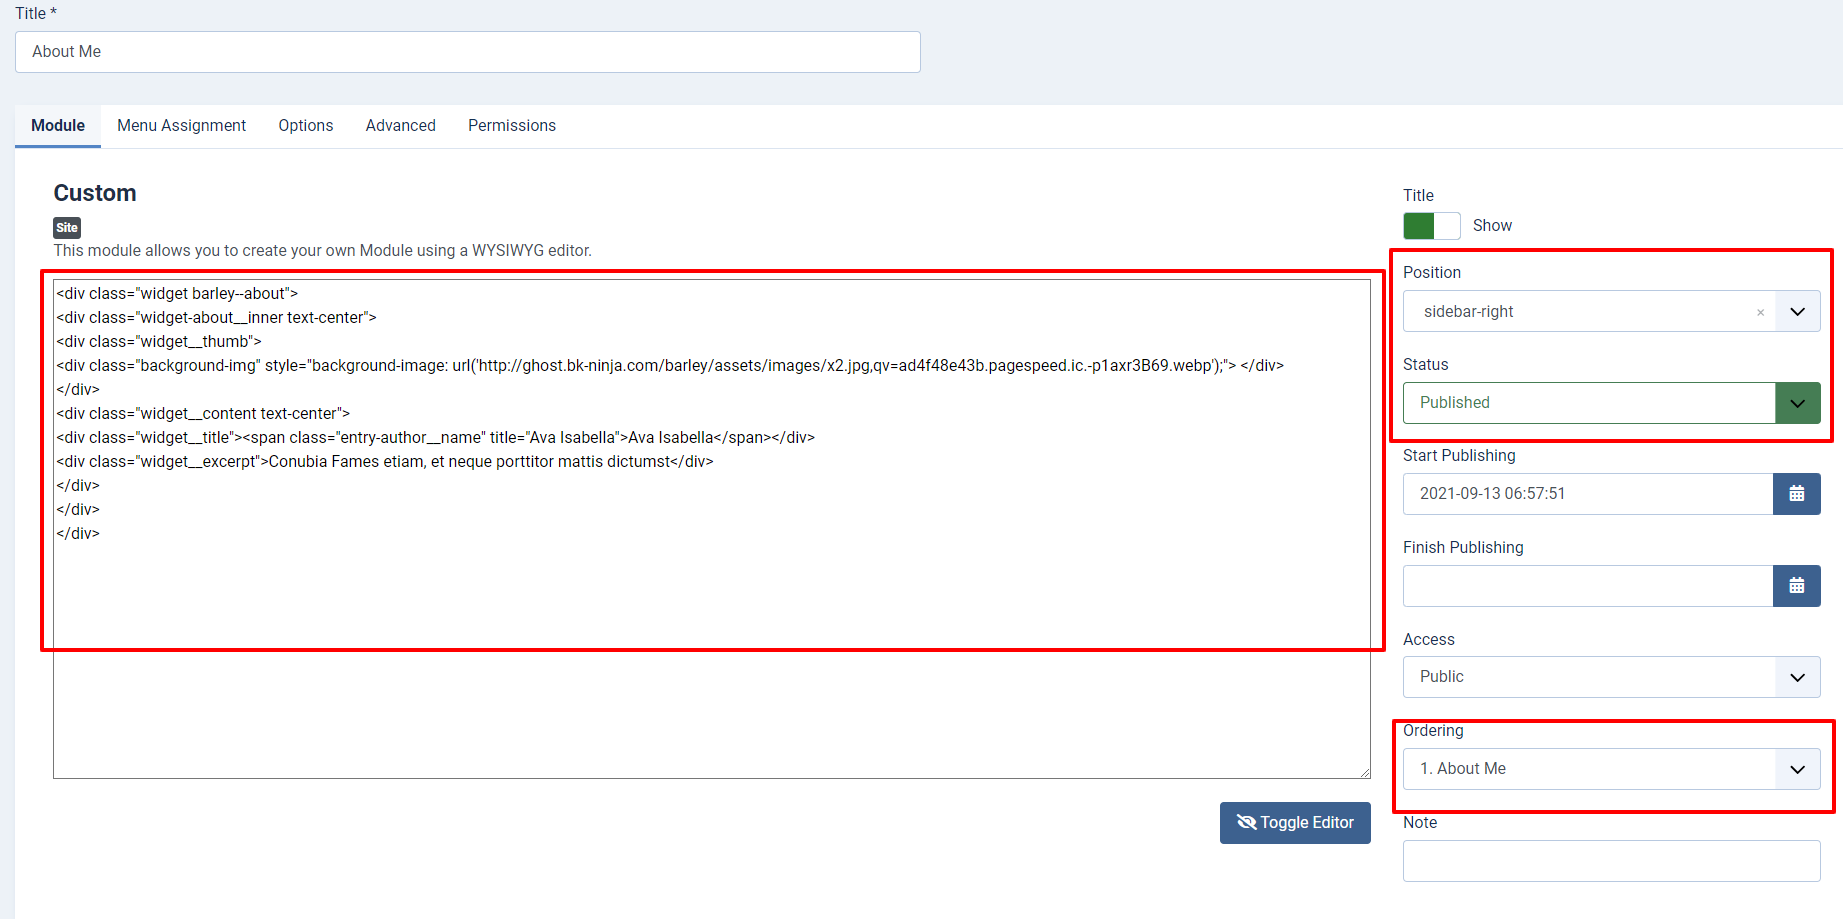
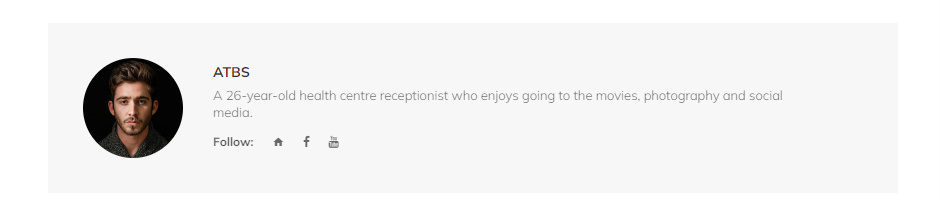
Position 4: About Me
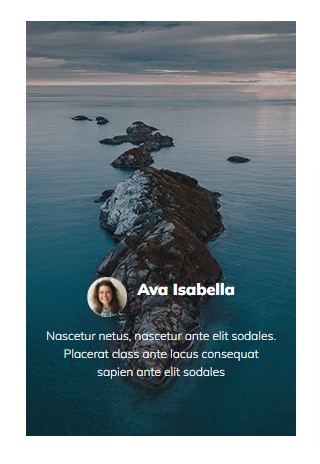
                  <div class="mnmd-widget widget widget-about-me">
                  <div class="about-me__inner">
                  <div class="about__thumb">
                  <div class="background-img" style="background: url('http://ghost.bk-ninja.com/takei/assets/images/image_07.png?v=be2f7cef85');">
                  </div>
                  </div>
                  <div class="about__text-wrap">
                  <div class="author__wrap clearfix">
                  <div class="author">
                  <a class="author__avatar" href="#">
                  <img src="https://secure.gravatar.com/avatar/6f934a64730e79d98743476632127a9c?s=512&d=mm&r=g" alt="" />
                  </a>
                  <div class="author__text">
                  <a class="author__name" href="#">Ava Isabella
                  </a>
                  </div>
                  </div>
                  </div>
                  <div class="about__text text-center">
                  <div class="about__excerpt">
                    Nascetur netus, nascetur ante elit sodales. Placerat class ante lacus consequat sapien ante elit sodales
                  </div>
                  </div>
                  </div>
                  </div>
                  </div>
Position 5: Widget Listing Horizontal


Position 6: Widget Listing Vertical


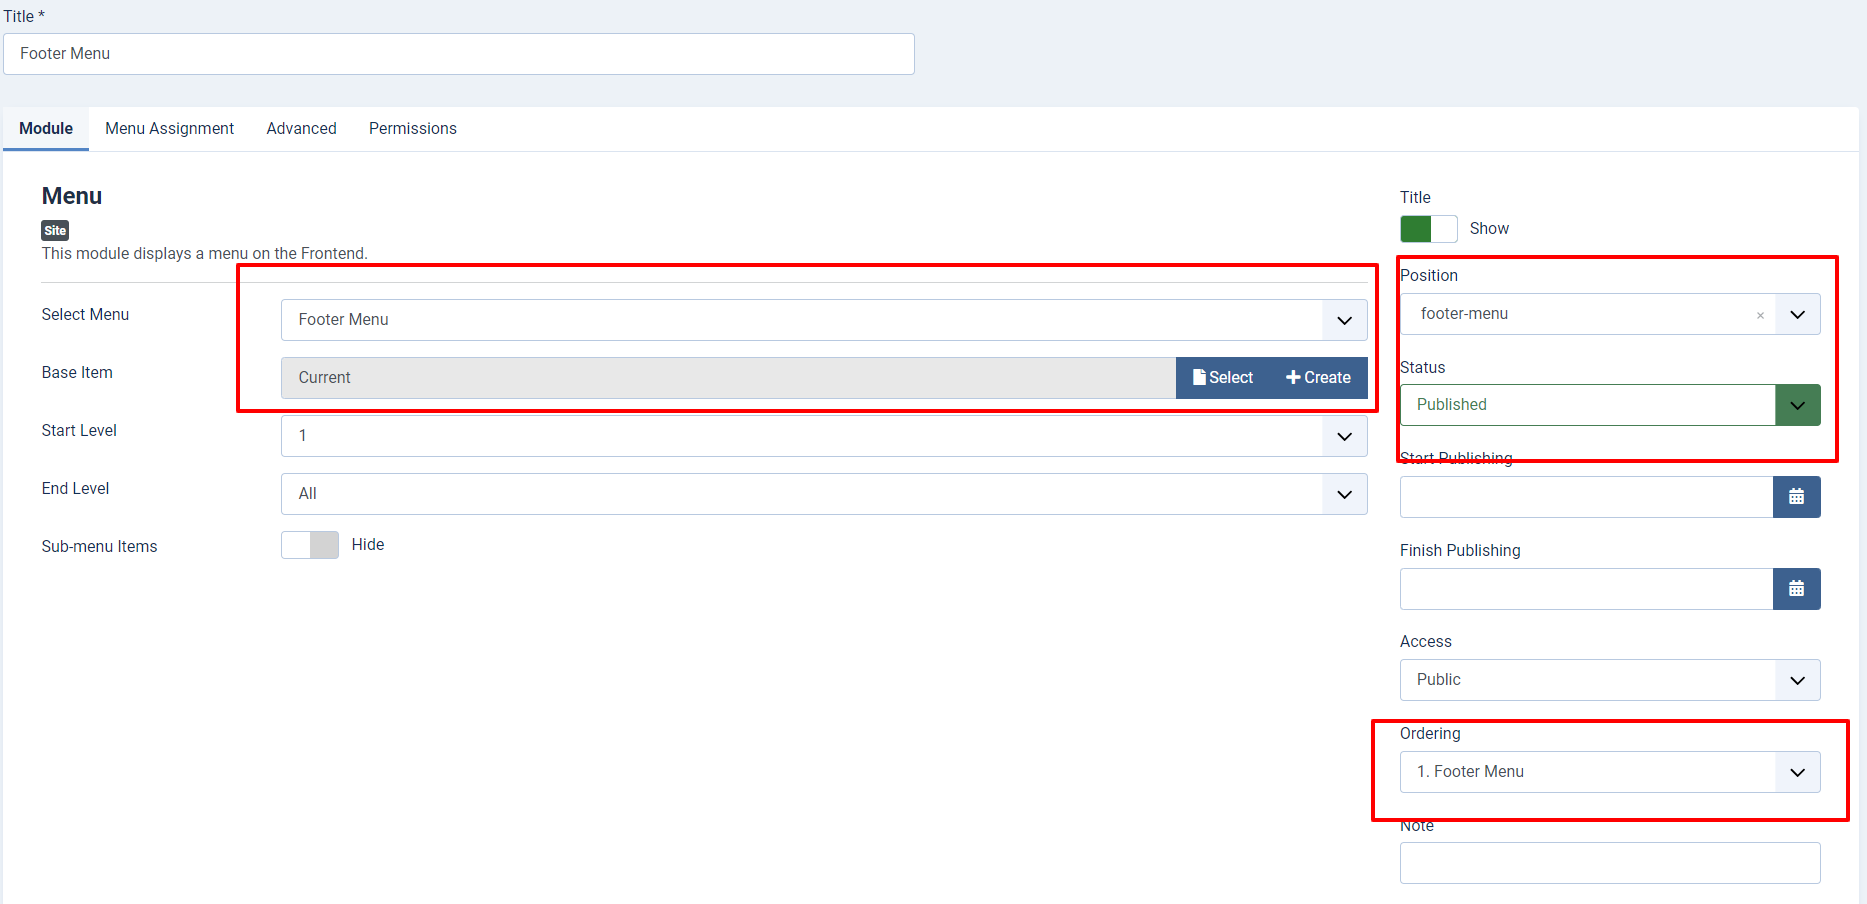
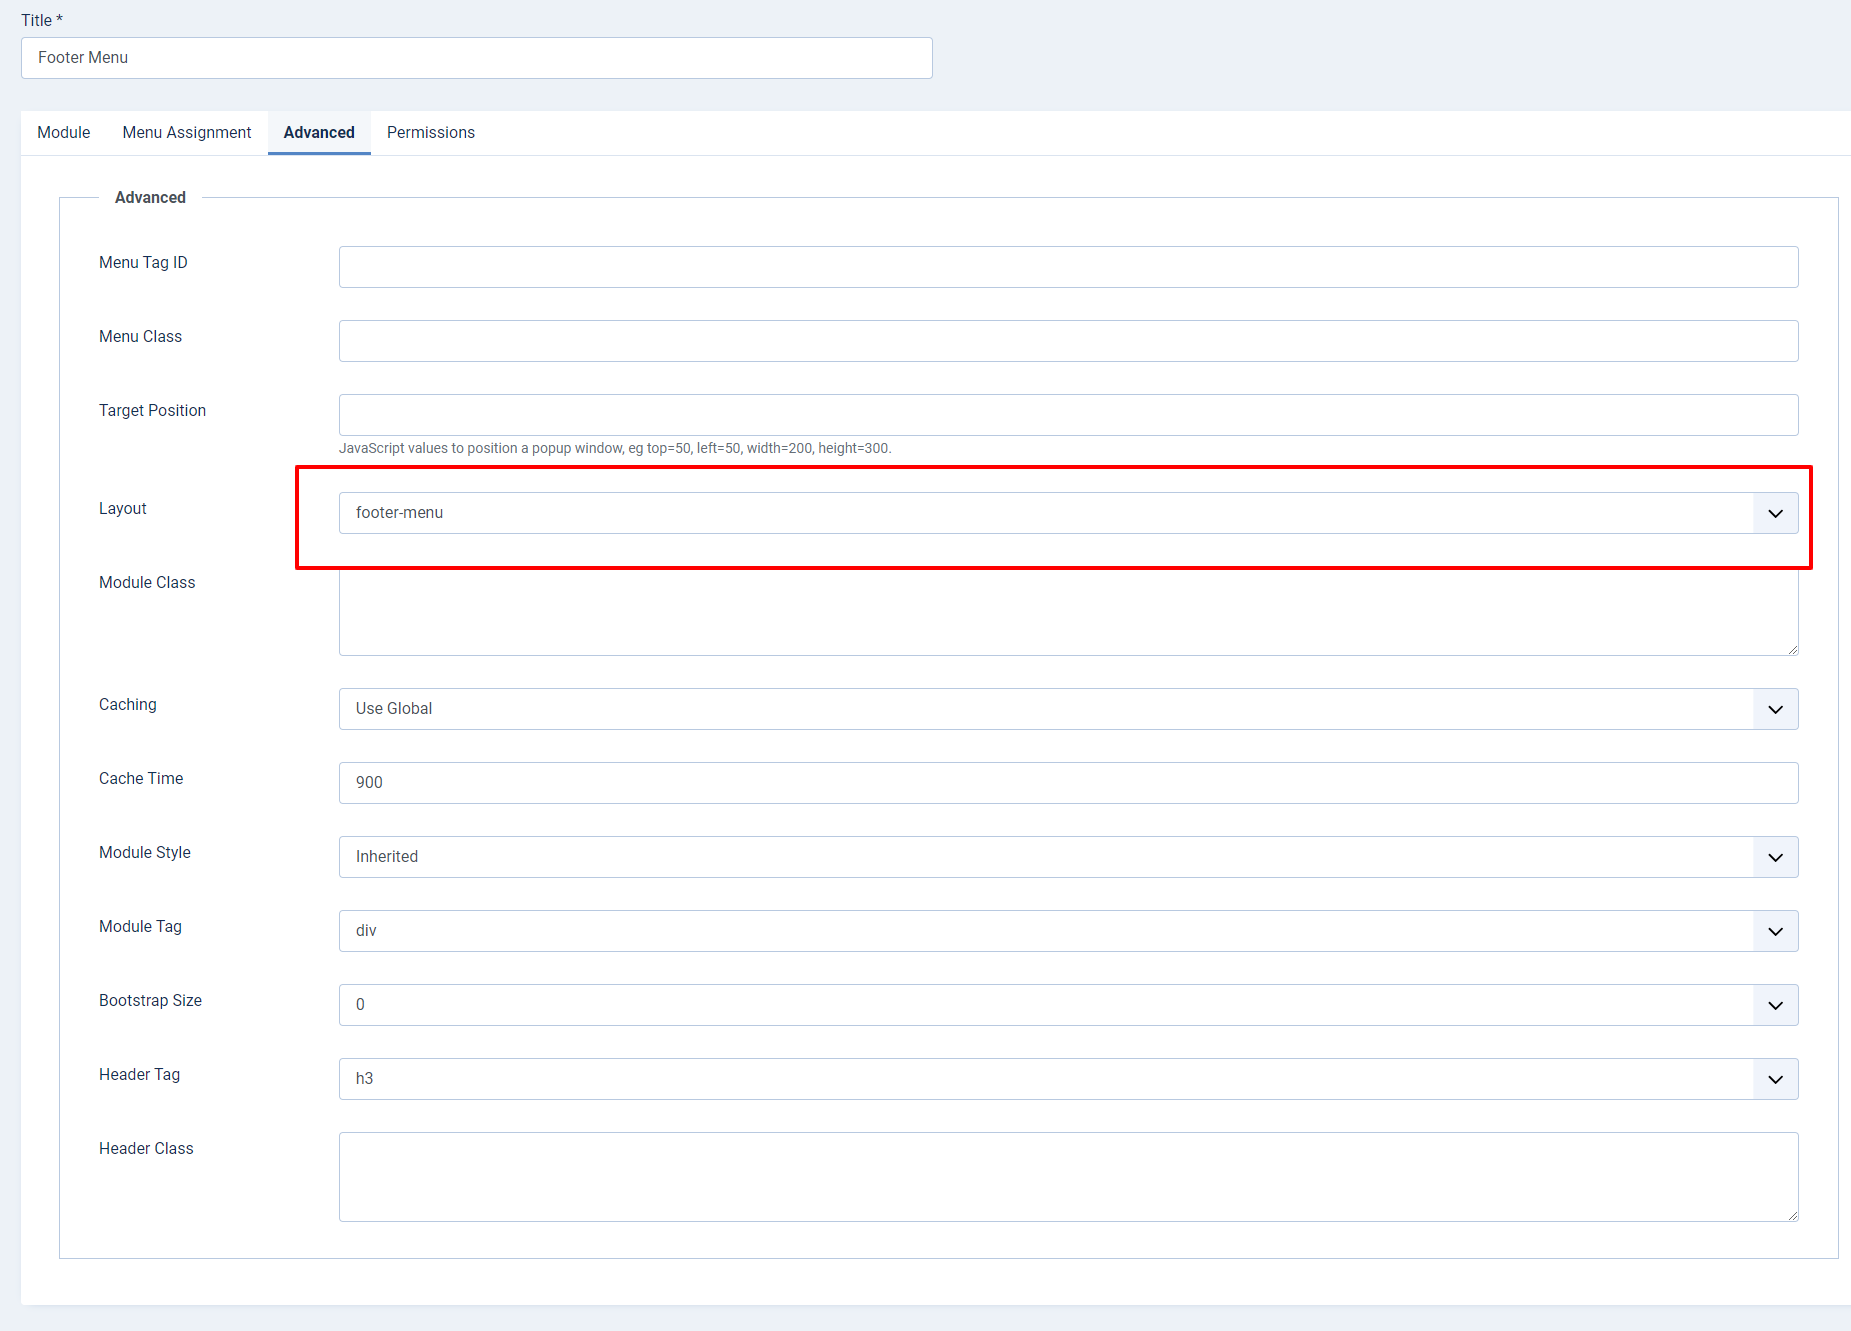
Menu Footer

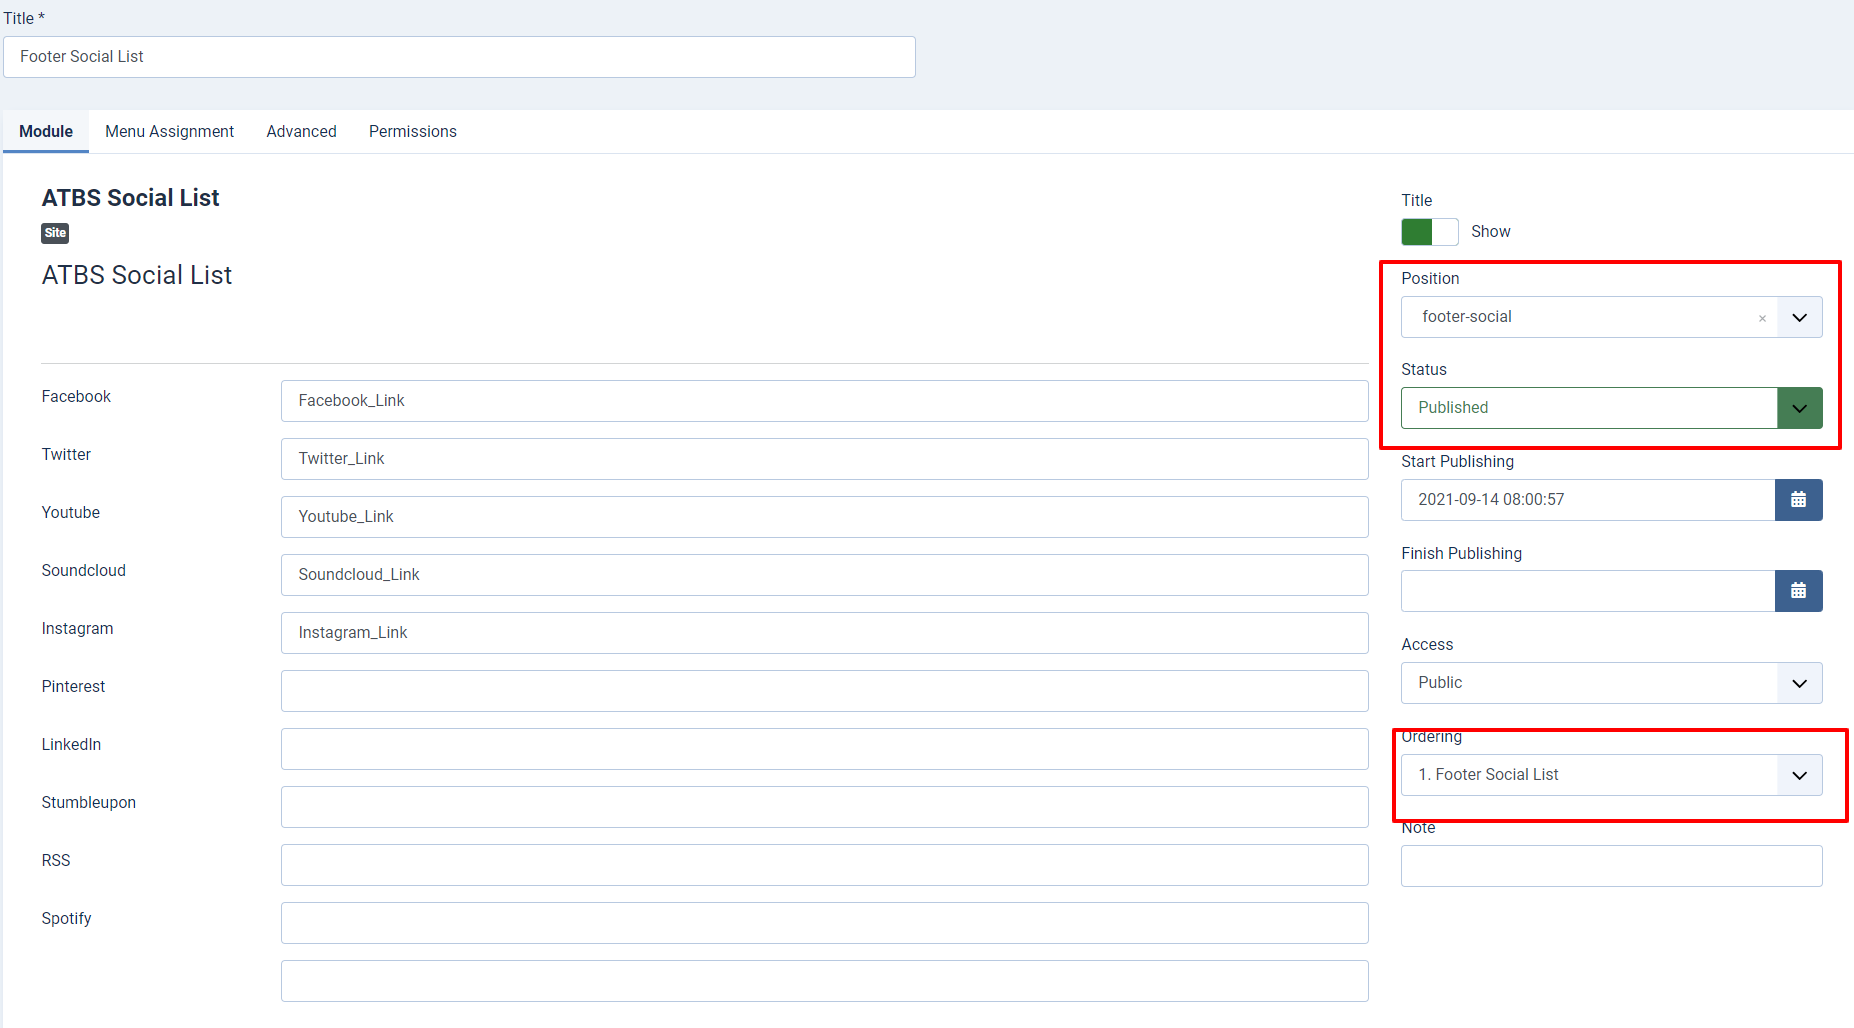
Position Footer Menu

Author Box
Please refer the video here:
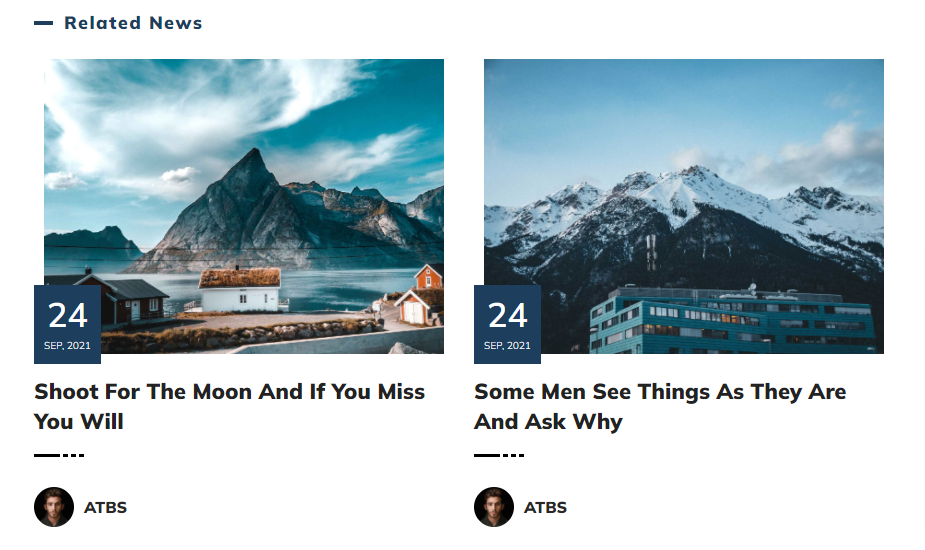
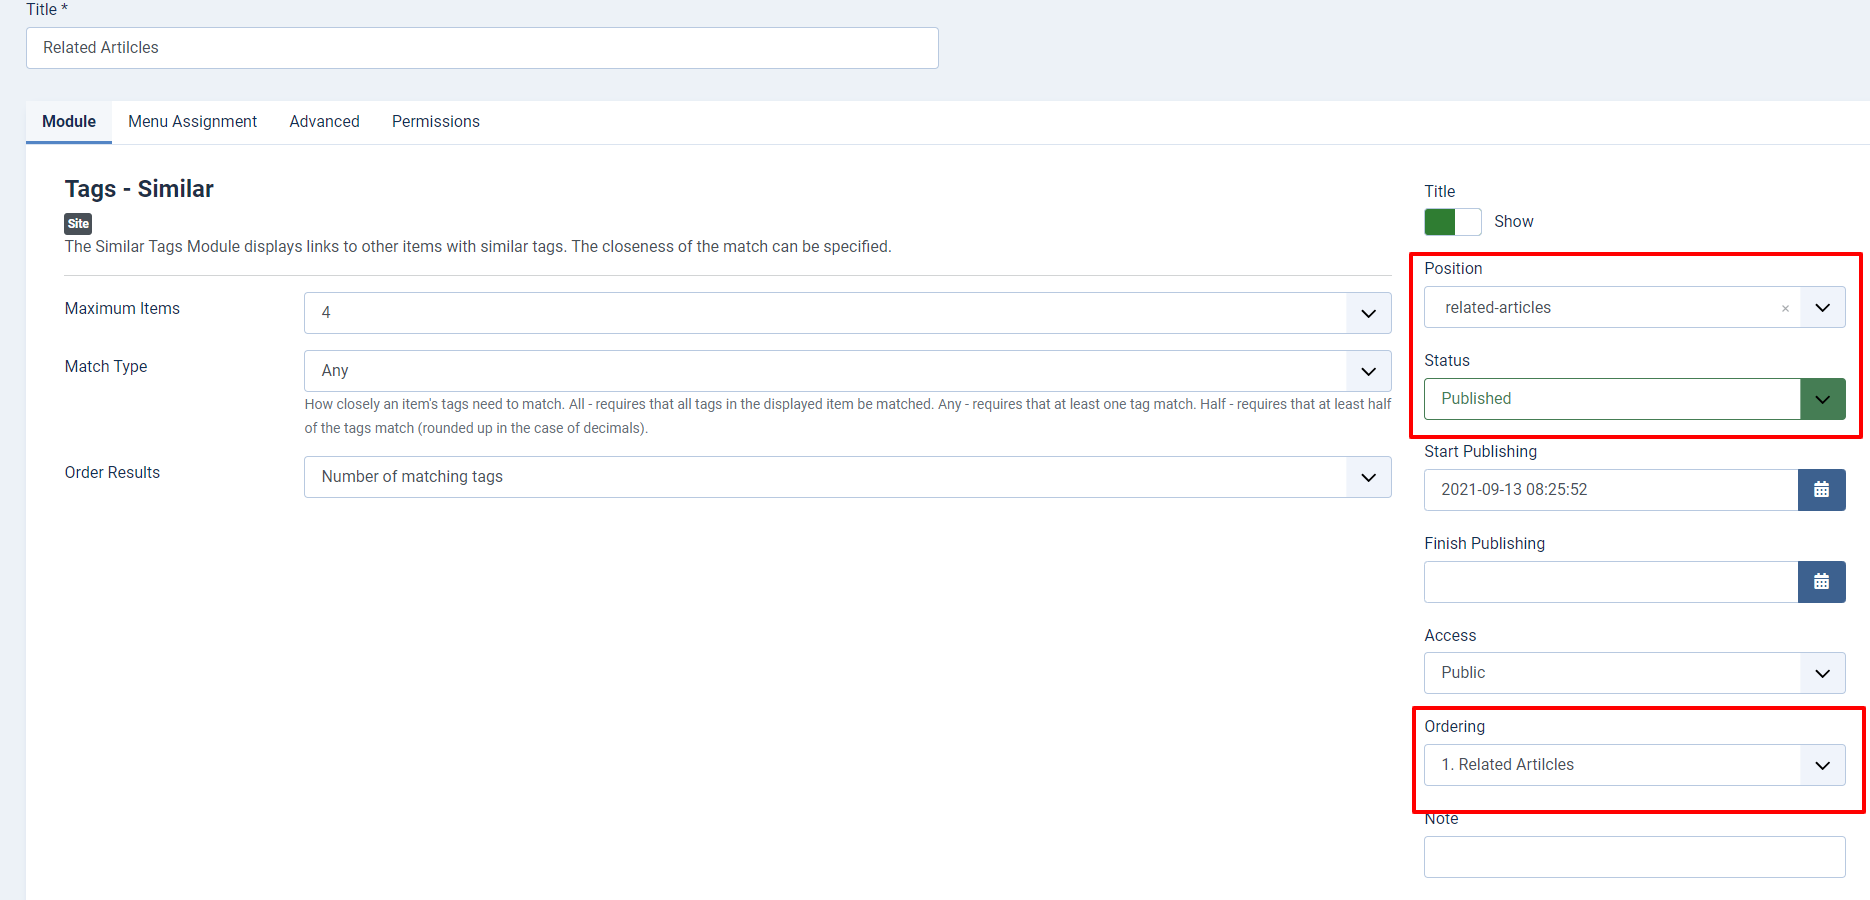
Related Articles